Concrete reinforcing steel mesh is welded wire reinforcement used to control cracking and distribute loads in slabs, pavements, and walls. Installed correctly, it speeds placement and keeps cracks tight for durable service. From our Woodbridge base at 370 New Enterprise Way, Dass Rebar supplies concrete reinforcing steel mesh across Ontario to help crews pour on schedule.
By Navjot Dass — Dass Rebar | Last updated: 2026-06-20
Overview: Concrete Mesh Essentials
Concrete mesh (welded wire reinforcement) strengthens slabs by holding microcracks tight and sharing loads between concrete and steel. Select the right wire size and spacing, support the mesh on chairs in the top third, and stagger laps. This complete guide covers specs, placement, logistics, and coordination for reliable slab performance.
When you’re building slabs, speed and consistency matter. The mesh you choose—and how you place it—directly affects crack control, joint behavior, and long-term wear.
- Definitions, benefits, and where welded wire mesh excels
- How mesh controls cracks and improves load sharing
- Spec shorthand: 6×6 with 6/6, 9/9, or 10/10 wires
- Placement best practices: cover, chairs, and laps
- Field checklists, submittals, and inspection targets
- Local delivery and staging tips for Woodbridge and York Region
For deeper dives as you read, see our practical guidance on mesh and rebar selection in mesh-reinforced concrete and this hands-on welded wire mesh reinforcement guide.
What Is Concrete Reinforcing Steel Mesh?
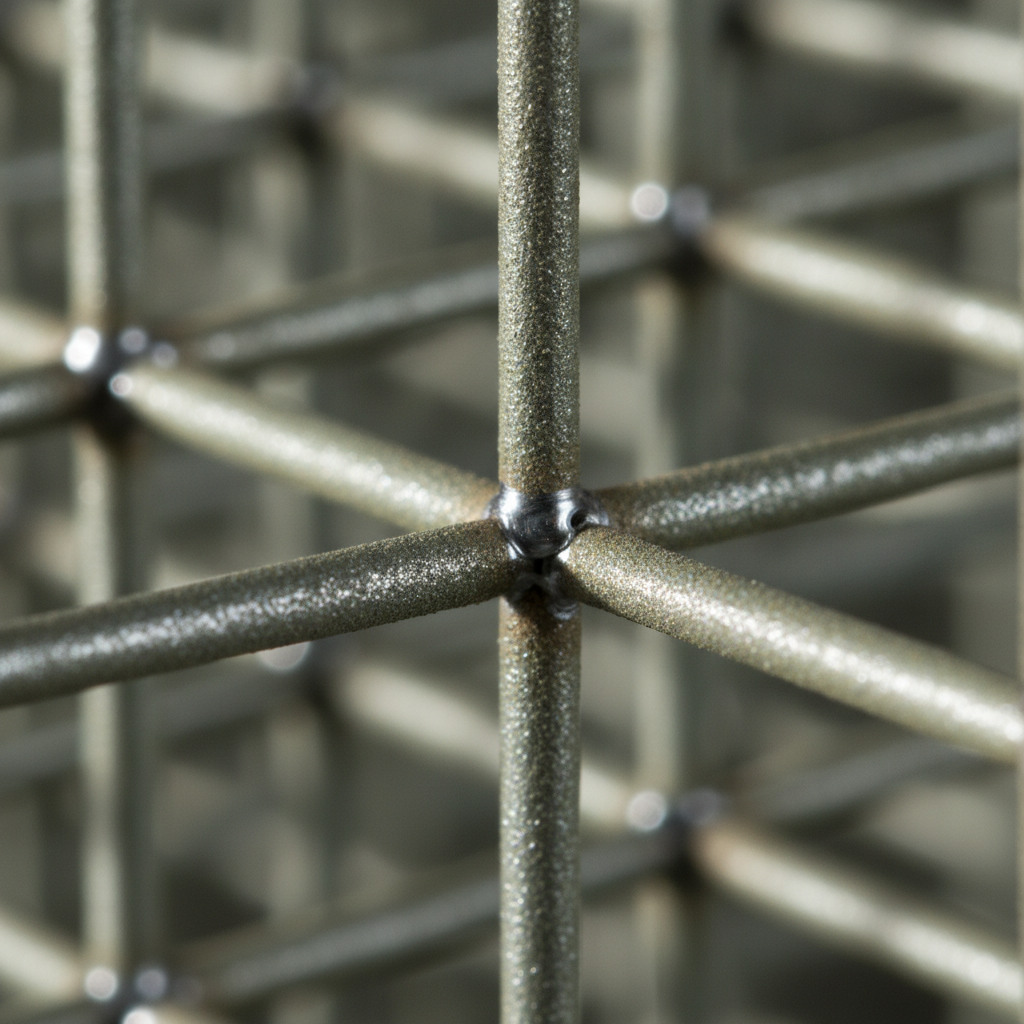
Concrete reinforcing steel mesh—often called welded wire reinforcement (WWR)—is a factory-welded grid of longitudinal and transverse wires. It’s specified by spacing (commonly 6×6 inches) and wire size, then supported on chairs near the slab’s top third to limit crack width and distribute loads.
In drawings, you’ll see formats like 6×6 W1.4/W1.4, or simply 6×6 10/10, indicating equal wire areas in each direction. The 6×6 spacing helps manage shrinkage and temperature cracking across slab panels.
At Dass Rebar, we maintain in-stock availability of welded wire mesh in standard 6×6 patterns with common wire sizes (6/6, 9/9, and 10/10). That stock position supports fast mobilization for slab pours and phased schedules across Ontario.
Where mesh is the right choice
- Slabs-on-ground for light to medium-duty traffic (walkways, pads, parking stalls)
- Warehouse and retail floors that favor rapid placement and uniform spacing
- Sidewalks, aprons, and patios where consistent crack control is the priority
For heavier, directional loads (e.g., beams, columns, thickened edge beams), individual reinforcing bars still dominate. Our concrete reinforcing bar guide explains when rebar becomes the better option.
Why Concrete Mesh Matters for Slab Performance
Concrete shrinks as it dries and moves with temperature. Welded wire mesh resists crack opening by taking tension across a uniform grid, keeping cracks narrow and serviceable. With correct cover and laps, it also improves load transfer and helps reduce slab curling and edge spalling.
Here’s the thing: slabs will crack. The goal is to keep those cracks tight and predictable. Mesh provides a pre-tied, consistent steel area across the whole panel, so when a crack forms, the wires engage and limit its width. Tight cracks mean better durability, cleaner joints, and fewer callbacks.
In our experience, projects that pair mesh with disciplined jointing (depth near one-quarter the slab thickness and timely saw cuts) see fewer random cracks and more uniform finishing. That translates to fewer patch repairs and stronger handoff to the owner.
For a side-by-side discussion of mesh versus bars in different slab types, visit our overview on rebar and wire mesh.
How Concrete Mesh Works (Load Sharing and Crack Control)
Mesh controls cracks by taking tension where concrete is weak. Welded intersections act like shear connectors, turning the grid into a mat that spreads stress and keeps cracks narrow. Proper chairing holds the steel in the slab’s top third, where tensile stresses peak under bending.
Imagine a uniform lattice that “catches” developing cracks. As slabs shrink or bend under pallets and forklifts, each wire carries tension and helps transfer load to adjacent concrete. That’s why placement matters: steel works when it’s where the tension is.
Three placement targets guide field success:
- Top-third cover: commonly 1.5–2 inches to finished surface for interior slabs unless drawings say otherwise
- Lap lengths: often two grids (12 inches) minimum; stagger adjacent laps to avoid a weak line
- Continuous support: chairs or bolsters at reasonable spacing so mesh doesn’t drop during placement
Want to visualize how mesh planning connects to project outcomes? We unpack it step-by-step in our mesh steel reinforcement explainer.
| Design Stage | Decision | Field Target |
|---|---|---|
| Mesh selection | 6×6 grid with 6/6, 9/9, or 10/10 wires | Match slab thickness and expected traffic |
| Sheet sizing | Pre-cut sheets vs rolls | Favor sheets for flatter placement on commercial work |
| Support method | Plastic or concrete chairs/bolsters | Hold top-third consistently |
| Lap length | Minimum two grids unless noted | Stagger from row to row |
| Control joints | Depth and spacing plan | Depth near 1/4 slab; timely cuts |
Types, Specifications, and Codes
Most slab projects use 6×6 welded wire mesh in three common wire sizes—6/6, 9/9, and 10/10—conforming to ASTM A1064 for welded wire reinforcement. Pre-cut sheets are favored on commercial jobs for flatter placement and faster inspection.
Dass Rebar supplies standard welded wire mesh sheets suitable for interior slabs, sidewalks, and light-duty pavements. In more aggressive environments (e.g., deicing salts), designers often combine slab mesh with epoxy-coated reinforcing steel at edges and thickened sections to bolster corrosion resistance.
Common options compared
| Mesh Option | Typical Uses | Advantages | Watch-outs |
|---|---|---|---|
| 6×6 6/6 | Walkways, patios, light pads | Lightweight, quick handling | Verify adequacy for concentrated loads |
| 6×6 9/9 | General slabs-on-ground, retail/warehouse | Balanced strength and weight | Good chairing is essential |
| 6×6 10/10 | Heavier-duty slabs, equipment pads | Higher steel area per foot | Plan crew size for handling |
Need a quick product refresher? Review a concise welded wire mesh overview for context on manufacturing and typical applications.
Best Practices for Placement, Laps, Cover, and Joints
Support mesh on chairs to keep it in the top third, lap a minimum of two grids (12 inches) unless drawings state otherwise, and stagger laps. Verify cover at multiple points per bay. Plan joint depth and timing so cracks form where you intend.
Execution makes or breaks slab performance. Good drawings and good habits deliver consistent results across pours and crews.
Pre-pour checklist (field-proven)
- Subbase compacted and graded; vapor retarder (as specified) installed neatly
- Chairs spaced to prevent sag; mesh sheets staged by sequence
- Laps measured and tied at intervals; rows staggered
- Penetrations coordinated so the mesh isn’t cut short
- Joint layout and saw type (early-entry vs conventional) agreed upon
We’ve found that photographing the setup—showing chair spacing, measured laps, and cover checks—reduces pre-pour disputes and speeds sign-off. If you’re weighing alternatives by slab type, our welded wire mesh reinforcement guide outlines selection patterns that crews can follow intuitively.
Tools, Submittals, and Field Resources
A clear submittal that lists mesh size, ASTM designation, chairing method, lap lengths, and joint plan prevents rework. In the field, simple tools—wire-size cards, lap gauges, bolt cutters, pliers—keep crews consistent across bays and phases.
Practical documentation keeps inspectors and owners aligned. A typical submittal covers wire spacing and size, mechanical properties, sheet dimensions, and coating (if applicable). Shop drawings show lap zones, penetrations, and pour breaks so installers can place sheets with minimal trimming.
- Submittals: mesh spec, ASTM A1064 reference, layout diagrams
- Field tools: tape, lap gauge, tie wire, pliers, bolt cutters
- Inspection: verify top-third placement at multiple locations
- Records: date-stamped photos of cover, laps, and chairs
Coordinating with other trades pays dividends. For example, metal framing teams benefit when slab edges are consistent and cracks are controlled—see this perspective on metal framing systems for broader site coordination thinking.
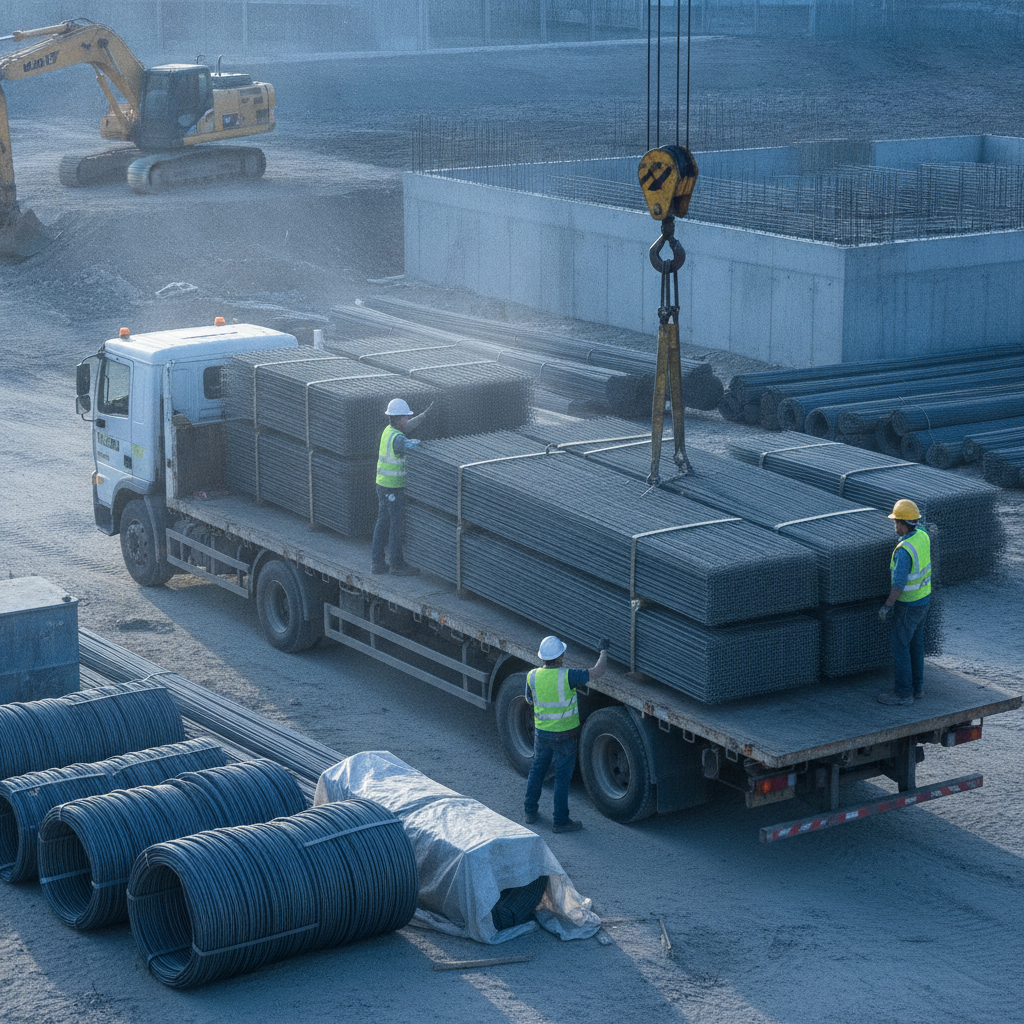
Local Delivery, Staging, and Site Logistics (Woodbridge, York Region)
Dass Rebar coordinates welded wire mesh deliveries across Woodbridge and the Regional Municipality of York from 370 New Enterprise Way. We band sheets by pour sequence, plan crane picks, and schedule early-morning arrivals for tight sites—keeping sidewalks open and pours on time.
Our dedicated trucking fleet and project coordination shorten slab cycles. We tag mesh packs by zone and pour number, so your crew can unload in order and roll straight into placement. Where rebar bundles and mesh share lay-down areas, our dispatcher sequences loads to minimize double-handling.
On constrained sites near active streets, creating a safe, off-street unloading pocket matters as much as steel tonnage. Coordination with general contractors, finishers, and pump crews ensures mesh reaches the deck at the right moment, not too early and never late.
Local considerations for Woodbridge
- Plan deliveries to avoid peak congestion around Queen St / Highway 50; early slots help large flatbeds clear the area smoothly.
- Winter pours need heated enclosures and chair bearing checks on thermal blankets; confirm sequencing during pre-pour meetings.
- For jobs near the Highway 50 – Zum Queen Stop EB corridor, arrange flagging and off-street unloading to reduce disruption.
To see how framing and slab planning connect in practice, explore this site-focused note on avoiding exterior framing mistakes—the same logistical discipline keeps concrete work humming.
Case Studies and Practical Examples
Ontario projects that pre-plan mesh delivery and placement see faster cycles and cleaner floors. Staging sheets by pour, verifying laps, and holding top-third cover consistently reduce rework and improve finishes on multi-building sites.
High-rise podium slabs in Toronto benefited from pre-cut, labeled mesh sheets sized to pour breaks. Crews walked sheets onto chairs, tied staggered laps, and started placing concrete within minutes. Early-entry sawing captured planned cracks, leaving joints tight and tidy.
Warehouse floors across the GTA commonly adopt 6×6 9/9 mesh for a balance of handling and performance. Where forklifts run hard wheels, consistent joint depth and timing—combined with mesh—help reduce edge spalling and surface curling over time.
Municipal sidewalks and plazas, especially at transitions and curb returns, often use 6×6 10/10 for added steel area. With careful chairing, edges stay supported and crack widths remain within serviceable limits through freeze-thaw cycles.
Our portfolio includes The Hawthorne Residences (Toronto), Hickory Terraces (Waterloo), and The Grand at Universal City (Pickering). Across these builds, punctual deliveries and clear shop drawings were the common thread.
Considering how mesh integrates with bar reinforcement in the same slab? Start with our steel wire mesh overview and compare with the rebar-specific notes in the Ontario rebar guide.
Advanced Coordination and Alternatives (Rebar, Epoxy Coats, and GFRB)
Mesh isn’t a one-size-fits-all solution. Heavily loaded slabs, edges, or corrosive exposures may combine welded wire mesh with rebar (including epoxy-coated bars) or use specialty reinforcement like GFRB. Detailing and shop drawings reconcile overlaps so steel works together without congestion.
Designers often specify Grade 500W or 400W rebar at thickened sections and edges, while retaining 6×6 mesh in the field of the slab for shrinkage and temperature control. Where deicing salts are present or waterfront exposure is possible, epoxy-coated reinforcing steel raises corrosion resistance, extending service life.
Glass Fibre Reinforcing Bars (GFRB) see use in select environments where magnetic neutrality or corrosion resistance is critical. When combining materials, detail clear lap zones and chairing plans so each reinforcement type sits at the correct elevation without conflicts.
On larger sites, individual bars—10m, 15m, and 20m sizes—may supplement mesh where loads concentrate beneath equipment or at load-bearing walls. Our team’s in-house estimating and detailing align these transitions in the drawings so the field install remains straightforward.
Planning a slab pour? We can help.
Need submittal-ready mesh, accurate takeoffs, and punctual delivery windows? Our estimating, detailing, fabrication, and trucking teams coordinate to keep your slab sequence moving—so you pour on time and pass inspections with confidence.
If you’d like a fast review of your mesh selection or a takeoff aligned to pour breaks, our Ontario team is ready to help. Share your drawings and we’ll prepare a tidy package: quantities, mesh schedules, and delivery sequencing that match your site constraints. For background reading, see our concise weld mesh reinforcement guide.
Frequently Asked Questions
These quick Q&As address mesh selection, placement, and coordination. Always follow your engineer’s drawings and specifications; the answers here summarize standard field practice for slabs-on-ground and similar work.
Is concrete mesh the same as rebar?
No. Mesh is a welded grid placed mainly in slabs and pavements to control crack width. Rebar is individual bars used where higher, directional strength is required, such as beams, columns, thickened slabs, and edge beams.
How much should welded wire mesh overlap?
A common field rule is to lap a minimum of two grids (12 inches) unless the structural drawings specify otherwise. Stagger laps between adjacent rows and tie them so the mat acts continuously during placement.
Where should the mesh sit in the slab?
Keep the mesh in the top third of the slab to resist tensile stresses and limit crack opening. Use rated chairs or bolsters and verify cover at multiple points before placing concrete.
Do I still need control joints if I use mesh?
Yes. Control joints create planned crack locations. Mesh helps keep cracks tight, but you still need properly spaced and timely cut joints to prevent random cracking and curling.
Can I combine mesh with epoxy-coated rebar?
Yes. It’s common to use mesh in the field of the slab and epoxy-coated rebar at edges, thickened sections, or corrosive exposures. Detail chairs and laps clearly so the steel works together without congestion.
Conclusion and Key Takeaways
Concrete reinforcing steel mesh delivers faster placement and reliable crack control when you select the right wire size, hold top-third cover, stagger laps, and coordinate deliveries. Pair it with disciplined jointing and subbase prep to get predictable, long-lasting slabs.
Concrete will move; the craft is managing that movement. With welded wire mesh and consistent field practice, you’ll keep cracks tight, joints clean, and schedules predictable.
- Choose 6/6, 9/9, or 10/10 based on slab thickness and loads
- Support on chairs; verify cover at multiple points
- Lap a minimum of two grids (12 inches) and stagger adjacent rows
- Plan joint depth and timing alongside delivery sequencing
- Use epoxy-coated bars or GFRB where exposure warrants added protection
Ready to align mesh, delivery, and pour sequence? Our Woodbridge team coordinates estimating, detailing, fabrication, and trucking so your concrete work stays on track from the first submittal to the last saw cut.
For supply-chain perspective and related materials, review a concise mesh product overview and practical framing coordination notes like metal framing systems and exterior framing pitfalls to avoid—useful when multiple trades share tight lay-down space.