
Rebar cages are prefabricated or site-tied frameworks of reinforcing steel that hold bars to exact spacing and cover before a concrete pour. They keep steel in position during placement and vibration so the member reaches design strength and durability. Dass Rebar supports Ontario builders from Woodbridge, ON with estimating, detailing, fabrication, delivery, and assembly.
By Navjot Dass • Last updated: 2026-05-27
Above the fold: why this guide and what you’ll learn
This complete guide explains what rebar cages are, why they matter, and how to plan, fabricate, and install them. Use it to reduce rework, accelerate pours, and pass inspections. We include step-by-step workflows, best practices, and Ontario-ready examples drawn from Dass Rebar’s integrated estimating-to-assembly process.
Here’s the thing—most delays come from tiny coordination gaps between drawings, fabrication, and jobsite logistics. We close those gaps with clear roles, hold points, and practical checklists your crews can use tomorrow.
- What rebar cages are and where they’re used (footings, columns, walls, mats)
- Shop-built modules versus site tying—when each makes sense
- How a cage moves from takeoff to pour in 6 coordinated phases
- Best practices for cover, tie patterns, lifting, labeling, and QA/QC
- Tools, standards, and safety references worth bookmarking
- Ontario examples from residential, commercial, and infrastructure work
Quick summary
Rebar cages lock bar geometry so concrete members perform as designed. The fastest, cleanest results come from accurate detailing, jig-based prefabrication, sequenced delivery, and verified placement with proper cover. Standardized checklists and lift plans consistently shorten placement windows and simplify inspections.
- Primary keyword: rebar cages (appears in title, slug, and content)
- Core actions: detail right, prefab when possible, verify cover, document checks
- Local context: coordinated deliveries across the GTA and Ontario
- Cluster link: see our reinforcing bar guide for 10M, 15M, and 20M specifics

What are rebar cages?
A rebar cage is a three-dimensional assembly of reinforcing bars—held by ties, hoops, or spirals—that preserves spacing and concrete cover during placement. By preventing steel movement under vibration, cages enable designed strength, crack control, and durability once the concrete cures.
Think of the cage as the skeleton of a concrete member. Longitudinal bars carry primary tension/compression; closed ties or spirals maintain alignment and resist buckling. Spacers and chairs maintain concrete cover so bond develops and corrosion risk stays low.
- Typical components: longitudinal bars, stirrups/hoops/spirals, tie wire (14–16 gauge), spacers/chairs, lift tabs.
- Where used: footings and mat foundations, grade beams, columns/caissons, shear/core walls, elevator cores.
- Bar sizes in Ontario: 10M, 15M, and 20M appear frequently; bars larger than 25M show up in heavy mats or infrastructure.
- Cover benchmarks: interior formed faces commonly target 1.5–2 in. cover; cast-against-earth faces often require 3 in. or more.
On congested work, spiral ties at 4–6 in. spacing hold geometry tightly. For aggressive environments, epoxy-coated rebar helps delay chloride attack; GFRP eliminates steel corrosion risk and is non-conductive—useful near sensitive equipment.
For foundational definitions and material properties, our steel rebar basics article expands on grades (400W/500W), coatings, and bond behavior.
Why rebar cages matter
Cages control geometry, cover, and load paths—the three levers that govern performance. Properly built cages resist drift during pours, cut placement time, and pass inspections cleanly. The payoff is measurable in fewer fixes, tighter schedules, and more durable structures.
When bars shift even 0.5 in. during vibration, cover and spacing change enough to impact crack widths and durability. Small dimensional misses multiply across long walls and heavy mats. Conversely, prefabricated modules with tagged lift points turn complex reinforcement into repeatable field work.
- Performance: correct spacing preserves designed capacity and serviceability (crack width control).
- Speed: modules often cut field tying hours significantly on repetitive elements.
- Compliance: inspectors focus on cover, splice/coupler placement, and bar marks before concrete.
- Safety: fewer loose bars and defined picks reduce trip and pinch hazards on deck.
Where chloride exposure is expected—parking decks, podium slabs over road salt routes—epoxy-coated reinforcement is a common mitigation. For a deeper dive on corrosion-resistant options, see our overview of reinforcing steel and mesh types.
How rebar cages work: from drawing to pour
Rebar cages translate design intent into stable, liftable steel frameworks. Estimating quantifies, detailing clarifies, fabrication shapes and labels, pre-assembly fixes geometry, delivery sequences loads, and field crews set cover and alignment before the first yard of concrete arrives.
Below is the proven workflow our team uses with Ontario GCs and concrete crews. Each phase has clear outputs so downstream teams never guess.
- Estimating: precise takeoffs, alternates for epoxy-coated or GFRP where specified, and bar lists aligned to pour breaks.
- Detailing: shop drawings with bend shapes, bar marks, lap/coupler locations, tie spacing, and lift tabs noted.
- Fabrication: cutting and bending to tolerances; bundle by mark with weather-resistant labels.
- Pre-assembly: tie submodules in jigs; confirm diagonals and lift integrity.
- Delivery: sequence trucks to crane windows and laydown limits; protect coated bars in transit.
- Installation: set chairs/spacers, place modules, plumb and brace, then lock with finish ties and document checks.
| Phase | Primary owner | Output |
|---|---|---|
| Estimating | Supplier | Bar list; alternates |
| Detailing | Supplier | Shop drawings; tags |
| Fabrication | Supplier | Cut/bent bundles |
| Pre-assembly | Supplier | Jigged submodules |
| Delivery | Supplier | Sequenced loads |
| Installation | GC/Concrete | Set cages; QA logs |
Want a deeper breakdown of fabrication tolerances and tag standards? See our rebar fabrication guide covering bend radii, length checks, and weather-proof labeling.
Types, methods, and approaches
Rebar cages differ by element (footing, column, beam, mat), assembly method (shop-built modules vs. site tying), and material (black steel, epoxy-coated, GFRP). Choose based on exposure, geometry, crane access, and schedule. Prefabricated modules shine on repetitive work with reliable picks.
By element
Each element drives a different cage geometry and tie pattern. Getting the right spacers and tie spacing upfront keeps inspection simple.
- Footings and mats: two-layer grids, typically with 10M–20M bars at 6–12 in. spacing; bar supports at 3–4 ft intervals.
- Columns and caissons: longitudinal bars with closed ties or spirals; wheel spacers maintain 1.5–3 in. cover depending on exposure.
- Beams and grade beams: stirrups at regular spacing (often 6–12 in. o.c.), top/bottom bars with hooks, laps, or couplers.
- Shear/core walls: vertical curtains with horizontal ties; stacked panel modules reduce field tying on cores.
By fabrication method
- Shop-built modules: best for repeatability; labeled marks and lift points; jigs ensure diagonal control within 1/2 in. over typical panel lengths.
- Site-tied cages: flexible when access is tight or geometry is unique; more dependent on crew skill and weather.
| Choice | Best when | Watch-outs |
|---|---|---|
| Prefabricated modules | Repetitive layout, solid crane access, tight QA | Transport length/weight limits; staging room |
| Site-tied cages | Unique geometry, constrained access | More site hours; variable tie quality |
By material and protection
- Black steel: standard for interior or low-exposure elements.
- Epoxy-coated steel: green-coated bars for chloride-prone zones like decks; handle with non-abrasive supports.
- GFRP: non-corrosive and non-conductive; follow manufacturer bend radii and anchorage guidance.
For a materials refresher—grades 400W/500W, coated options, and welded wire mesh—our rebar supply guide summarizes what’s commonly stocked for Ontario work.
Best practices for rebar cages
Protect cover, control geometry, label clearly, and plan lifts. Use correct spacers and tie patterns, confirm jig-made diagonals before shipping, and verify elevation and clearances on site. Document checks so inspectors can clear pours quickly and confidently.
Detailing and tags
- Show bend shapes, bar marks, and splice/coupler locations on every sheet; note lift points and temporary stiffeners.
- Group repetitive marks; weather-resistant tags should survive transport and rain.
Fabrication and pre-assembly
- Confirm bend angles and legs; small angle errors compound over long panels.
- Tie submodules in jigs; keep diagonals within tolerance (e.g., 1/2 in. across 10–12 ft panels).
- For epoxy-coated bars, use plastic or coated racks to prevent nicks that can lead to early corrosion.
Field placement and lifting
- Set chairs/side spacers to achieve cover on all faces (1.5–3 in. typical by exposure and member type).
- Use spreader beams for wide panels to limit deflection and bar slip; add tag lines and a designated signaler.
- Lock final position with finish ties, then complete cover checks before concrete arrives.
For element-specific details, compare with our foundation wall rebar details and the concrete footing guide to see typical tie spacing, laps, and chairs.
Tools and resources
Core tools include benders, cutters, tie guns, spreader bars, certified slings, and wheel/side spacers. Plan with cover charts, lap tables, and hoisting plans. Keep safety references handy for rigging and reinforcing hazards to answer field questions immediately.
- Shop/site tools: manual and powered benders/cutters, battery tie guns, pneumatic tools, spreader beams, clamps, and slings rated for module weight.
- Planning aids: one-page cover charts, bar mark maps, and lift diagrams posted at laydown.
- Material references: epoxy-coated and GFRP handling protocols to protect coatings and maintain performance.
- Supply: for reinforcement and accessories, review stocked products via our affiliate’s rebar products page.
Bookmarking a concise field sheet—cover by element, tie spacing, lift points—keeps crews aligned and speeds pre-pour checks.
Step-by-step: building and installing a rebar cage
Standardize these 12 steps: confirm drawings, stage by bar mark, pre-tie in jigs, verify diagonals and lifts, ship in sequence, set spacers, place and plumb, lock ties, record cover, get inspector sign-off, clear obstructions, then pour and consolidate without displacing steel.
- Confirm latest drawings and RFIs are incorporated before cutting the first bar.
- Stage bar by mark on dunnage; shield epoxy-coated bars from abrasion.
- Pre-tie submodules in jigs; add lift tabs and temporary bracing.
- QC diagonals/lengths versus shop drawings; log checks.
- Load and secure modules; plan turning radius and site access.
- Deliver on a timed slot aligned to crane availability and pour sequence.
- Set chairs/spacers to required cover before lowering modules.
- Pick with spreader beams; use tag lines and a signal person.
- Plumb, align, brace; lock with finish ties and re-check cover.
- Inspector sign-off for cover, splice/coupler placement, and bar marks.
- Final housekeeping: clear debris; plan vibrator paths.
- Place concrete in lifts; consolidate without bar displacement.
For module strategies and cycle-time wins on repetitive elements, our primer on prefabricated rebar cages walks through tagging, lifting, and staging patterns.
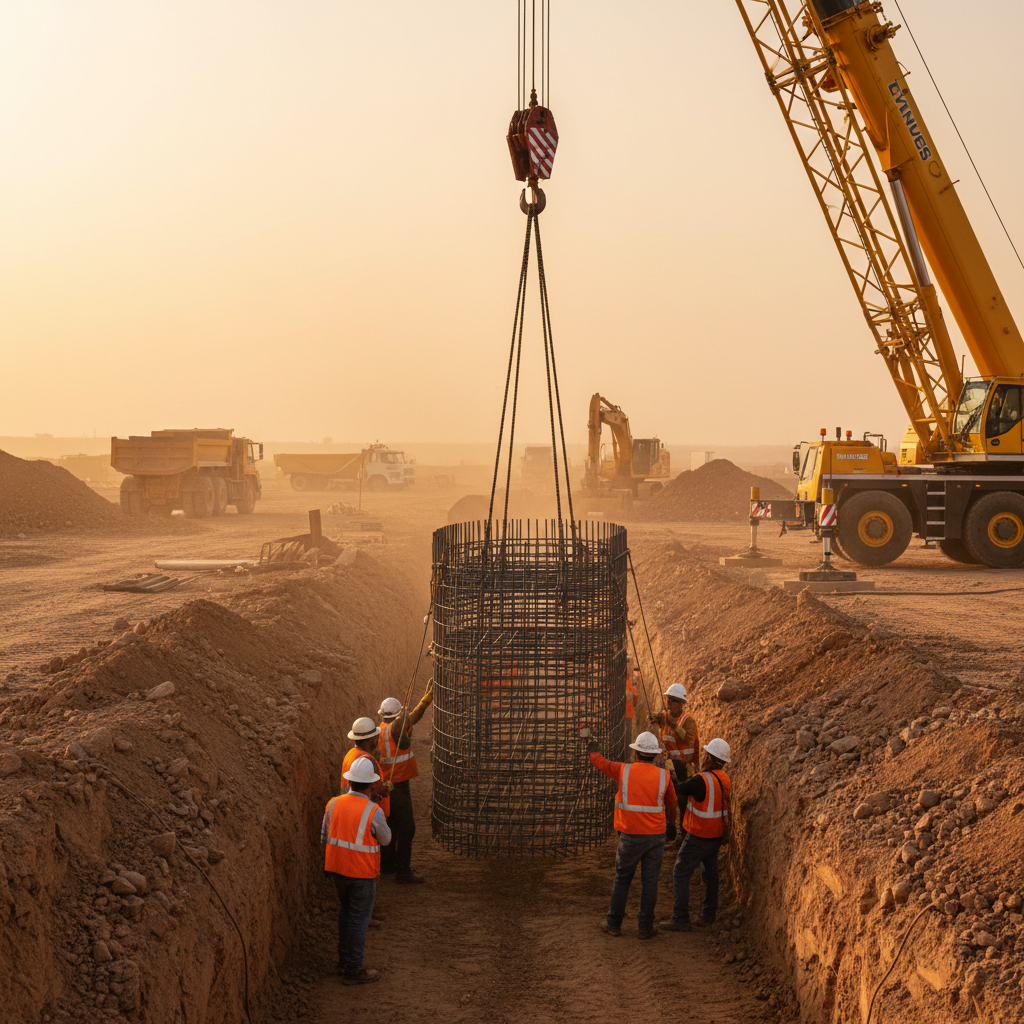
Need shop drawings or prefabricated cages on a tight timeline? Our in-house estimating, detailing, fabrication, and dedicated trucking compress site tying and keep pours on schedule. Let’s align drawings, logistics, and crane plans early.
Case studies and examples
Ontario projects show how prefabricated cages and clear checklists cut site hours and simplify inspections. By coordinating estimating, detailing, fabrication, delivery, and assembly, complex reinforcement becomes predictable field work with consistent cover and spacing.
Toronto core wall panels
For a tower core, stacked wall panels shipped with labeled lift points and weather-proof tags. Inspectors cleared panels at grade before picks, and crews set multiple panels per shift. The core cycle tightened as tie work moved from deck to shop jigs.
Waterloo townhouse footings
Footing grids arrived bundled by bar mark with chair kits. Crews staged by grid, hit cover on the first try, and placed concrete the same afternoon. Repeating the checklist across buildings maintained quality and pace.
Pickering podium mat
For a large podium mat, we broke reinforcement into modular mats. Diagonals stayed within tolerance, and coupler locations were pre-verified. The pour window held even with a tight laydown area.
For background on reinforcement choices used in these scenarios, review the material overview in our rebar supply guide.
Local considerations for 370 New Enterprise Way
- Plan deliveries around peak traffic periods in Woodbridge to keep crane picks on schedule and laydown clear.
- Cold snaps demand extra attention to epoxy-coated bar handling and winter concreting plans across the GTA.
- For municipal and infrastructure work, coordinate early with inspectors; MTO-ready submittals and labeled modules speed approvals.
Frequently asked questions (FAQ)
Contractors ask when to prefab, how to protect cover, and what documentation clears inspections fastest. These concise answers reflect field-proven steps our Ontario teams use to reduce tying hours and keep pours predictable.
When should we choose prefabricated rebar cages instead of site tying?
Choose prefabricated modules when elements repeat, crane access is reliable, and deliveries can stage near picks. Shop-built cages improve consistency and speed on cores, beams, and mats. For unique geometry or tight access, site tying stays practical.
How do we make sure concrete cover is correct?
Set the right chairs and side spacers for each face, then measure before the pour with a tape or cover gauge. Document cover on a pre-pour checklist. Inspectors look for consistent cover, especially on formed faces and elements cast against soil.
Do epoxy-coated or GFRP bars change how we tie cages?
Yes. Handle coated bars with non-abrasive supports and avoid nicking the coating during tying and lifting. GFRP requires manufacturer-recommended bend radii and compatible spacers. Plan lifts and bracing to prevent point loads on delicate components.
What documentation helps pass inspections faster?
Provide shop drawings with bar marks, splice/coupler locations, lift points, and cover notes. Add QC logs for bend checks and diagonals, plus a pre-pour checklist confirming cover, elevation, and final tie-off. Clear labeling speeds verification on the ground.
Key takeaways
Protect concrete cover, plan your lifts, label every mark, and document checks. Prefabricated modules cut site tying on repetitive work; site tying stays useful where access is tight. Align estimating, detailing, fabrication, and logistics early to keep pours on schedule.
- Rebar cages keep bar spacing and cover stable during placement and vibration.
- Use jigs and labeled modules to improve repeatability and inspection clarity.
- Set chairs and spacers for each face; verify cover before concrete arrives.
- Sequence trucks to crane windows and laydown constraints for smoother picks.
Conclusion and next steps
Rebar cages translate design into durable, buildable steel frameworks. Standardize the workflow—from takeoff to lift plan—to reduce errors and compress placement windows. When timelines tighten, prefabricated modules help you protect both quality and pour dates.
Ready to turn drawings into predictable field progress? Our integrated team supports end-to-end rebar projects with in-house estimating, detailing, fabrication, delivery, and on-site assembly—across residential, commercial, and infrastructure builds in Ontario.
For structural coordination beyond concrete, these primers on framing approaches can help balance sequencing between trades: see this overview of steel frame bracing and a practical guide to heavy gauge framing for planning interfaces.