
Commercial construction supplies are the materials, components, and logistics that keep concrete and steel work moving—rebar, welded wire mesh, formwork accessories, and reliable delivery. For projects across Ontario served from 370 New Enterprise Way in Woodbridge, Dass Rebar supports schedules with in-house estimating, detailing, fabrication, and coordinated rebar delivery.
By Navjot Dass • Last updated: 2026-05-28
Overview
This guide explains how to select, plan, and coordinate commercial construction supplies with a rebar-first approach. You’ll learn what each material does, how supply workflows reduce delays, and which best practices keep Ontario projects on schedule from takeoff to on-site assembly.
Use this playbook to align design intent, shop drawings, fabrication, and delivery windows—so your crew spends more time placing steel and less time waiting on trucks.
- What commercial construction supplies include and why they matter
- How coordinated rebar workflows cut rework and idle time
- Material types: Grade 400W/500W rebar, epoxy-coated options, GFRB, welded wire mesh
- Actionable checklists for takeoffs, submittals, and delivery sequencing
- Ontario-focused examples drawn from Dass Rebar’s project experience
Contents
- What Are Commercial Construction Supplies?
- Why Supplies Matter to Safety, Cost, and Schedule
- How Supply Workflows Keep Schedules on Track
- Types of Supplies: Rebar, Mesh, and More
- Best Practices for Sourcing and Management
- Tools and Resources for Planning
- Ontario Case Studies and Examples
- Frequently Asked Questions
- Conclusion and Next Steps
What Are Commercial Construction Supplies?
Commercial construction supplies are the structural materials and site-ready components required to build at scale—reinforcing steel, welded wire mesh, accessories, and the logistics that deliver them to crews on time. In Ontario, a rebar-first plan aligns estimating, detailing, fabrication, delivery, and on-site assembly to reduce waste and rework.
When most teams say “supplies,” they mean everything concrete and structural steel rely on. That includes reinforcing bar (10M, 15M, 20M and larger), welded wire mesh sheets (6×6 at 6/6, 9/9, 10/10), chairs, ties, couplers, and epoxy-coated or composite options for durability.
- Reinforcing bar (rebar): Typically Grade 400W or 500W in Ontario, straight or bent to bar lists. 20M rebar has a nominal diameter near 19.5 mm—ideal for columns and heavy mats.
- Welded wire mesh: Common patterns like 6×6–6/6 (wire size around 6 gauge), 6×6–9/9, and 6×6–10/10 for slabs-on-grade and composite decks.
- Coated and composite options: Epoxy-coated steel for corrosion resistance; Glass Fibre Reinforcing Bars (GFRB) where electromagnetic neutrality or corrosion performance is critical.
- Accessories: Chairs, spacers, ties, dowel caps, and bar supports that preserve cover and placement accuracy.
For clarity, this guide leans into reinforcing supplies—Dass Rebar’s specialty—because accurate takeoffs, shop drawings, fabrication, and trucking windows often control the pacing of a concrete schedule.
Why Supplies Matter to Safety, Cost, and Schedule
Right-sized, on-time supplies protect safety, control material waste, and keep labor productive. Coordinated bar lists, compliant grades, and punctual delivery reduce rework and idle time—often the hidden drivers of project overruns on commercial jobs.
Here’s the thing: crews don’t just need steel—they need the right steel, bent correctly, bundled logically, and staged where they can place it fast. Miss one input—wrong grade, missing bends, unclear tags—and you can lose a day across a large slab pour.
- Safety: Correct bar size, spacing, and cover support structural integrity. Proper chairs and spacers prevent exposure as forms deflect or crews vibrate concrete.
- Compliance: Infrastructure work demands traceable, compliant material (Ontario teams often specify 400W/500W; epoxy-coated in aggressive conditions). MTO-approved supply chains simplify submittals and inspections.
- Labor productivity: Bundles labeled by pour sequence, with matching shop drawings, let teams place rebar continuously versus stopping to search, cut, or re-bend.
- Schedule certainty: A dedicated trucking fleet with confirmed windows prevents idle pumps and overtime concrete waits.
In our experience supporting Ontario contractors, reinforcing supply discipline turns abstract drawings into fast, repeatable field motions. It’s a chain: estimating → detailing → fabrication → delivery → assembly. Tighten any weak link and the whole job moves smoother.
How Supply Workflows Keep Schedules on Track
A reliable workflow converts drawings into bar lists, shop drawings, fabricated steel, and timed deliveries. In-house estimating, detailing, and project management reduce handoff friction so crews receive the right bundles at the right time—ready for placement.
Commercial construction supplies flow best when the same partner manages key steps end to end. Dass Rebar integrates estimating, detailing, project coordination, fabrication, delivery, and on-site assembly—so information stays synchronized from takeoff through installation.
- In-house estimating: Quantifies bars by size (10M, 15M, 20M, etc.), length, bends, laps, and splices; aligns with pour breaks and crane picks.
- Detailing and shop drawings: Converts intent into bar lists, placement drawings, tags, and bundle maps to eliminate guesswork on deck.
- Fabrication and QA: Cutting, bending, tagging, and bundling to tolerances; epoxy-coated options and GFRB prepped to spec.
- Project management and trucking: Sequenced loads by pour date and crane zone; dedicated fleet for punctual windows across Ontario.
- On-site assembly: Crews place, tie, splice, and verify cover with chairs/spacers; foremen reconcile bundles against bar lists.
| Phase | Primary owner | Key deliverable | Schedule impact |
|---|---|---|---|
| Estimating | Dass Rebar | Quantities by size and shape | Locks scope; reduces change orders |
| Detailing | Dass Rebar | Shop drawings and bar lists | Eliminates field interpretation delays |
| Fabrication | Dass Rebar | Cut, bent, tagged bundles | Prepares materials for rapid placement |
| Delivery | Dass Rebar Fleet | Sequenced loads by pour | Prevents idle crews and pumps |
| Assembly | Site Crew | Placed, tied, inspected | Drives concrete schedule certainty |
Want a deeper dive into the logistics side? See this discussion on timely rebar delivery for practical coordination tips around windows, staging areas, and pour sequencing.
Types of Supplies: Rebar, Mesh, and More
Core commercial supplies for concrete include reinforcing bar (Grade 400W/500W), epoxy-coated options, Glass Fibre Reinforcing Bars (GFRB), and welded wire mesh in common 6×6 patterns. Accessories like chairs, ties, and couplers preserve cover and speed placement on commercial decks and slabs.
Let’s break down the reinforcing materials we most often plan, fabricate, and deliver across Ontario projects.
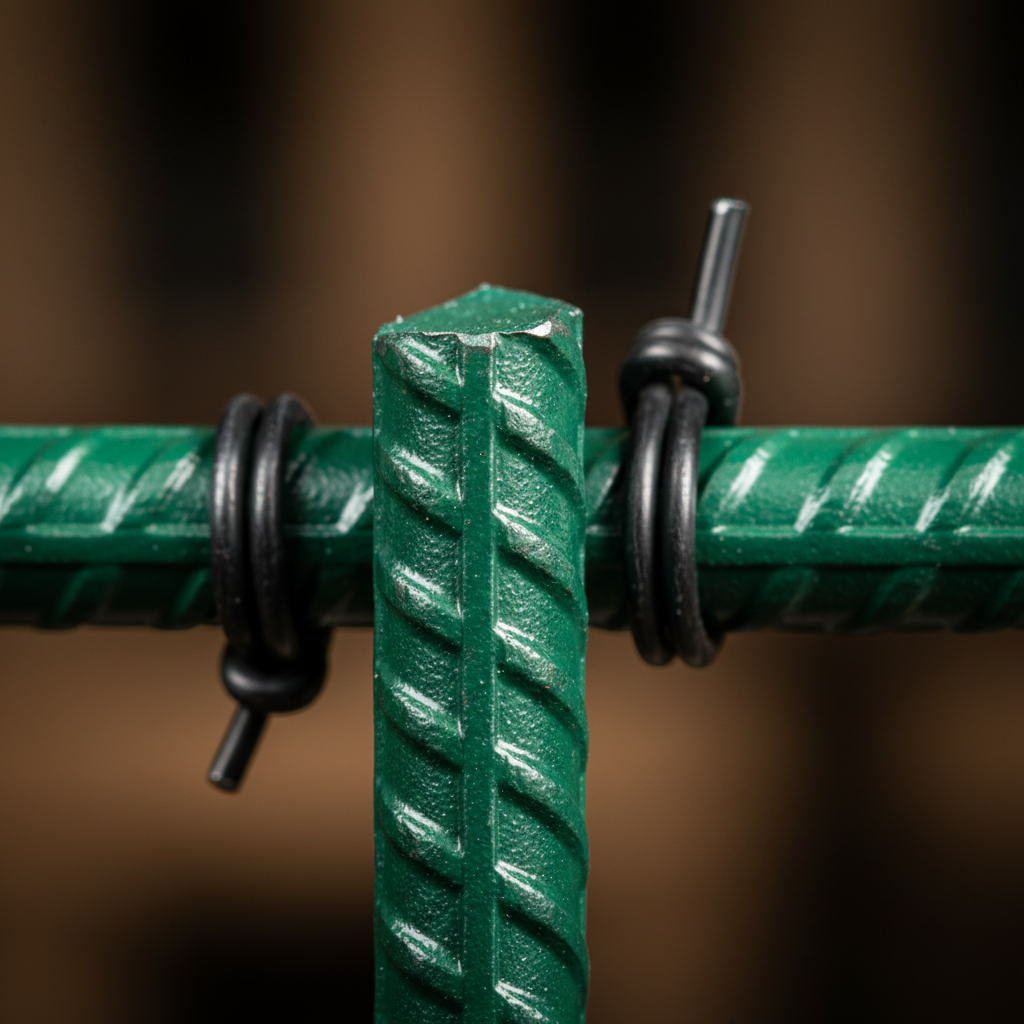
Reinforcing Bar (400W/500W) and Shapes
- Grades: Ontario projects commonly call for Grade 400W and 500W steel. The “W” references weldability requirements in Canadian practice; shop drawings confirm usage and lap lengths.
- Nominal sizes: 10M (~11.3 mm), 15M (~16 mm), 20M (~19.5 mm), 25M (~25.2 mm) and larger for heavy elements. Heavier bars reduce congestion where spacing limits govern.
- Shapes and bends: Hooks, stirrups, U-bars, and custom cages are fabricated to bar lists. Tight tolerances keep clear cover and spacing within placement limits.
- Use cases: Columns, cores, mats, podium slabs, transfer beams, shear walls, pile caps, and grade beams.
For a practical walkthrough of cutting and bending choices, our rebar fabrication guide outlines how shape codes translate onto the deck and where field adjustments can be avoided.
Epoxy-Coated Reinforcing Steel
- Why use it: Corrosion resistance where deicing salts, splash zones, or aggressive soils are present. The green coating provides a physical barrier that preserves steel performance.
- Handling: Use non-marring slings and padded hooks. Touch-up kits repair nicks from transport or placement.
- Applications: Parking structures, bridge decks, podiums exposed to chlorides, slab edges, and ramps.
Curious how epoxy compares to other options for your specific application? This quick overview of rebar product options provides a material-level snapshot across coatings and sizes.
Glass Fibre Reinforcing Bars (GFRB)
- Material: Non-metallic composite bars that don’t rust and are electromagnetically neutral (helpful around sensors or MRI-adjacent facilities).
- Weight and placement: Lighter than steel; crews often report faster handling for repetitive slab work.
- Design considerations: Different modulus and bond behavior versus steel; design and detailing must reflect manufacturer data.
GFRB is often a smart fit for chemically aggressive environments. When in doubt, align with the design team on splice lengths and development criteria early in detailing.
Welded Wire Mesh (6×6 Patterns)
- Common patterns: 6×6–6/6, 6×6–9/9, 6×6–10/10. Tighter gauges (e.g., 10/10) reduce crack widths for slabs-on-grade.
- Placement tips: Use chairs to maintain position mid-slab; pull-up with hooks is inconsistent and risks cover loss.
- Pours and joints: Coordinate sheet overlaps (often one full square) and control joints per the slab plan.
We maintain in-stock availability of common mesh patterns and sizes, so you can lock pours weeks ahead. For a side-by-side overview, see our note on rebar and wire mesh selection.
Accessories That Protect Placement Quality
- Chairs and spacers: Plastic or concrete supports that preserve cover; spacing depends on bar size and load during the pour.
- Ties and fasteners: Coiled ties and bar ties speed installation; consistent tying patterns improve cage stiffness during vibration.
- Couplers/dowels: Mechanical splices reduce lap congestion; dowel caps facilitate movement at expansion joints.
Accessories are small lines on a PO that create big schedule confidence. A few hundred chairs can preserve cover across thousands of square feet of slab.
Best Practices for Sourcing and Management
Prioritize end-to-end coordination—accurate takeoffs, clear shop drawings, sequenced fabrication, and confirmed delivery windows. Bundle by pour sequence, label visibly, and stage near crane zones. These basics protect labor productivity and cut idle time.
Best practices aren’t theory—they’re repeatable moves that reduce waste job after job. We use these across residential high-rise, commercial, and municipal work in Ontario.
- Start with a rebar-first takeoff: Quantify 10M/15M/20M and shapes against pours, not just totals. Align laps and splices with crane reach and deck sequencing.
- Lock shop drawings early: Finalize cover, bar marks, and lap locations. Resolve congested zones (elevator cores, transfer beams) before fabrication.
- Bundle for the pour: Label by elevation, grid, and sequence. Use weatherproof tags that match placement drawings.
- Confirm delivery windows: Dedicated fleet windows prevent concrete delays. Stage bundles close to picks to shorten walks.
- Standardize inspection: Quick checks—bar size, cover with chairs, tie density—avoid callbacks and rework.
- Close the loop: Reconcile returned tags/bundles to update percent-complete and the next load list.
Many teams like a written playbook. Our rebar supply guide walks through planning decisions that keep detailing, fabrication, and delivery in sync on multi-phase jobs.
Local considerations for 370 New Enterprise Way
- Plan deliveries to avoid peak site congestion across the Woodbridge area; early morning windows often keep staging areas clear for slab pours.
- Account for seasonal swings—summer heat accelerates set times, while winter conditions demand heated enclosures and cover checks before concrete.
- Coordinate with Ontario inspection schedules; having MTO-approved materials and traceable bar lists simplifies documentation on municipal and infrastructure scopes.
Tools and Resources for Planning
Use structured takeoff templates, bar list checkers, and bundle maps to remove ambiguity. Pair these with submittal trackers and delivery schedules so field leaders know exactly what’s arriving and where it goes on deck.
Here’s a simple toolkit we deploy with Ontario contractors. Adapt it to your scope and crew size.
Planning Templates
- Rebar takeoff sheet: Capture 10M/15M/20M quantities, bends, laps, and splices by pour. Include chair counts and coupler locations.
- Shop drawing index: Track revisions, bar mark ranges, and conflicting details to resolve before fabrication.
- Bundle map and tags: Tie bundle IDs to zones, elevations, and grids for quick staging and deck placement.
- Delivery schedule: Confirm dates, windows, and crane zones; carry a one-load lead time buffer for weather.
Field Aids
- Placement checklist: Chairs placed, cover verified, spacing confirmed, tie pattern consistent, penetrations coordinated.
- Daily percent-complete: Track placed bundles against the bar list; surface shortages fast to avoid tomorrow’s delays.
- Issue log: Record drawing conflicts and dimension questions in one spot to resolve in the next revision.
For more background on steel and mesh selection, explore this primer on rebar and mesh types, which outlines common patterns and where they fit in commercial slabs.
Ontario Case Studies and Examples
Coordinated reinforcing supply shortens cycle times. Across Ontario projects, bundling by pour, staging near picks, and confirming fleet windows helps crews place continuously—turning drawings into predictable, repeatable field motions.
Consider three representative scenarios drawn from our work supporting developers, general contractors, and concrete specialists across the province.

Podium Slab with Aggressive Exposure
- Challenge: Chloride exposure from deicing salts at a mixed-use development podium demanded corrosion protection.
- Approach: Epoxy-coated 15M and 20M with chairs sized for cover; bundles staged by grid in a tight downtown site.
- Result: Continuous placement across the pour window; fewer field adjustments due to pre-checked bends and tags.
Residential High-Rise Core and Mat
- Challenge: Congested elevator core and heavy mat foundation risked slowdowns from rebar congestion.
- Approach: Early detailing coordination resolved lap locations; mechanical couplers reduced lap length where spacing governed.
- Result: Faster cage assembly and fewer clashes with MEP sleeves; cycle time stabilized floor to floor.
Municipal/Infrastructure with Compliance Demands
- Challenge: Documentation and traceability for public work needed MTO-compliant materials and submittals.
- Approach: Dass Rebar’s MTO-approved status simplified submittals; shop drawings and bar lists stayed aligned with inspection schedules.
- Result: Shortened review loops and predictable delivery windows supported milestone dates.
Looking to replicate these wins on your next project? Our reinforcing steel guide expands on decision points that cut rework and protect your schedule.
Frequently Asked Questions
Contractors ask most about material selection, sequencing, and documentation. The answers below focus on practical steps—what to decide, when to lock details, and how to keep reinforcing supply aligned with pour schedules.
What should I include in a rebar takeoff?
List bar sizes (10M, 15M, 20M, etc.), lengths, bends, laps, splices, and couplers by pour sequence. Include welded wire mesh counts, chairs, and ties. Tie every quantity to a shop drawing and bar mark so bundles, tags, and deck placement align without guesswork.
When should I choose epoxy-coated rebar?
Use epoxy-coated bars where corrosion risk is elevated—parking structures, podium slabs near traffic, bridge elements, or splash zones. Handle with padded slings, repair small nicks with touch-up kits, and confirm cover with appropriate chairs to preserve the coating’s protection.
How do I prevent placement delays on slab pours?
Bundle by pour sequence, label visibly, and stage near crane picks. Confirm delivery windows with a dedicated fleet, and reconcile placed bundles daily. A short checklist—bar size, cover, tie density—catches small issues before they become lost hours on pour day.
What mesh pattern should I use for commercial slabs?
Contractors often choose 6×6–6/6, 6×6–9/9, or 6×6–10/10 welded wire mesh. Heavier gauges control crack widths more effectively. Use chairs to maintain position mid-slab, plan sheet overlaps per the slab design, and align with joints and penetrations.
Conclusion and Next Steps
Commercial construction supplies move fastest when estimating, detailing, fabrication, and delivery run as one workflow. A rebar-first plan—sequenced bundles, clear tags, and confirmed fleet windows—lets crews place continuously and protect your pour schedule.
Here are the key takeaways we reinforce on every Ontario project:
- Plan around pours: Quantities, bends, and laps should follow pour breaks and crane zones.
- Lock drawings early: Resolve congested details before fabrication begins.
- Bundle for speed: Labels and maps remove deck ambiguity so crews place continuously.
- Protect delivery windows: A dedicated trucking fleet reduces idle time and rework risk.
- Standardize checks: Chairs, cover, tie patterns, and daily reconciliation preserve quality.
Next steps
- Review our reinforcing steel supply guide to align planning decisions with your next milestone.
- Share drawings for in-house estimating and a coordinated bar list.
- Finalize shapes and laps using the steel rebar basics reference, then confirm delivery windows.
- For slab planning, see 10M rebar uses and the reinforcing steel guide for placement tips.
Want help mapping bundles to your pour sequence? We’re ready to coordinate fabrication and trucking across Ontario. If you’re near 370 New Enterprise Way in Woodbridge, we can align site windows that fit your staging plan.
Get a coordinated reinforcing plan
Send your drawings and desired pour dates. We’ll return a clear bar list, shop drawings, and a delivery schedule that crews can trust—backed by our dedicated fleet and MTO-approved supply chain.