20M rebar is a Canadian metric reinforcing bar with a nominal diameter of about 19.5 mm used for slabs, beams, walls, and footings. It delivers a strong balance of strength and constructability. Dass Rebar at 370 New Enterprise Way in Woodbridge supplies 20M rebar on request, with in-house estimating, detailing, fabrication, delivery, and on-site assembly.
By Navjot Dass — Dass Rebar
Last updated: 2026-06-09
Overview
This guide explains what 20M rebar is, where it fits best, and how to specify, fabricate, deliver, and install it without delays or waste. You’ll learn sizing, coatings, spacing, cover, common alternatives, and a practical takeoff-to-pour workflow tailored to Ontario projects, supported by Dass Rebar’s end-to-end reinforcing services.
For project teams, 20M rebar often anchors suspended slabs, transfer beams, shear walls, and thick footings. Getting it right means aligning bar size with loads, spacing, cover, and lap lengths—and coordinating shop drawings, bends, tags, and delivery windows. Below you’ll find fast answers, deeper context, and tools you can put to work this week.
Quick Summary
- Definition: 20M rebar is a metric reinforcing steel size (nominal diameter ~19.5 mm; area ~300 mm²) widely used in mid- to heavy-duty concrete members.
- Strength grades: Common Ontario grades include 400W and 500W. 500W is standard for many structural applications because of its higher yield.
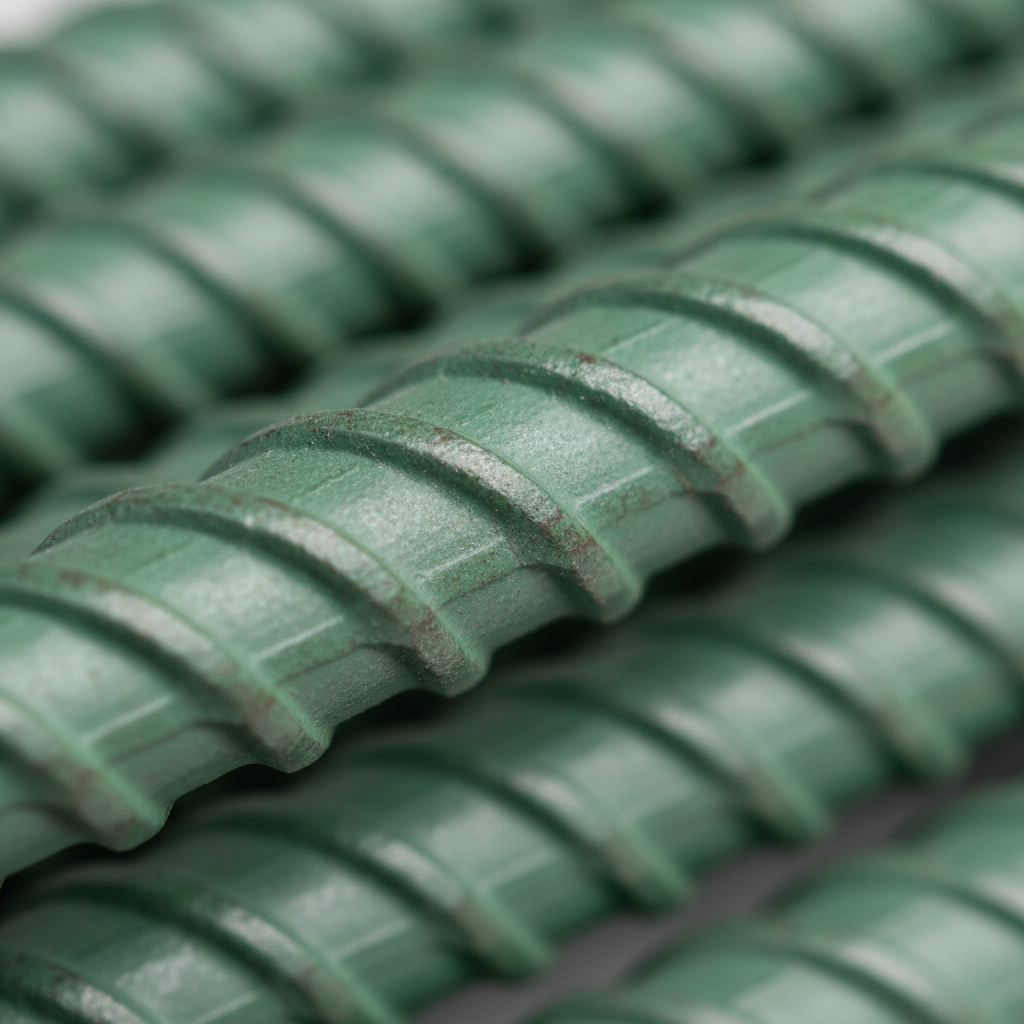
- Coatings: Black (uncoated) for interior concrete; epoxy-coated for deicing salt/chloride exposure; GFRB as a corrosion-resistant alternative in select cases.
- Best uses: Slabs, beams, thick mats/footings, shear and core walls, grade beams, and heavily loaded spread footings.
- Workflow: Accurate takeoff → in-house detailing → cut/bend fabrication → labeled bundles → scheduled trucking → on-site assembly → pour.
- Supported by Dass Rebar: Estimating, detailing, fabrication, delivery, assembly—coordinated from Woodbridge for jobs across the GTA and Ontario.
What Is 20M Rebar?
20M rebar is a Canadian metric reinforcing bar with a nominal diameter near 19.5 mm and a cross‑sectional area close to 300 mm². It’s specified for concrete members that need higher strength than 15M provides, without the weight and spacing tradeoffs of 25M.
In Ontario, engineers commonly choose 20M when loads, spans, or punching shear demand a “step up” from lighter bar sizes. It strikes a practical balance: large enough to reduce bar count and congestion, yet workable for typical bends, hooks, and lap lengths within standard formwork dimensions.
Dimensional snapshot (metric rebar)
| Metric size | Nominal diameter (mm) | Area (mm²) | Mass (kg/m) | Typical applications |
|---|---|---|---|---|
| 15M | ~16 | ~200 | ~1.57 | Light to moderate slabs, stairs, small beams, residential walls |
| 20M | ~19.5 | ~300 | ~2.35 | Mid- to heavy-duty slabs, transfer beams, core/shear walls, grade beams |
| 25M | ~25.2 | ~500 | ~3.93 | Heavily loaded beams/columns, thick mats, infrastructure elements |
These nominal values guide early decisions. Final selection should reflect design loads, spacing and cover constraints, congestion risk, and constructability. In our experience, 20M often reduces bar count compared to 15M, easing field tying and improving placement speed while maintaining code-required steel area.
Why 20M Rebar Matters on Ontario Sites
20M rebar matters because it delivers high yield capacity with manageable congestion in slabs, beams, and walls. In Woodbridge and the Regional Municipality of York, it’s a go-to for mid- and high-rise cores, transfer elements, and mats where 15M is undersized and 25M can hinder placement.
Contractors weigh structural demand against installation reality. Bars too small create endless tying; bars too large cause clashes with embeds and MEP. 20M sits in the “just right” zone for many GTA projects, keeping spacing practical and laps achievable while supporting heavier loads and longer spans than lighter sizes.
- Strength-to-congestion balance: 20M’s area (~300 mm²) reduces total bar count relative to 15M, trimming ties and field labor.
- Constructability: Bend radii and hooks remain reasonable for standard shop equipment and onsite handling.
- Versatility: From podium slabs to shear walls and grade beams, 20M provides reliable performance in typical GTA building systems.
- Coordination-friendly: Better clearance for conduits and sleeves compared to dense mats of 15M at tight spacing.
We’ve found that early coordination—pairing accurate takeoffs and in-house detailing—prevents congested zones around openings, embeds, and coupling sleeves. That’s why our teams align detailing, fabrication, trucking, and assembly to keep pours on schedule.
How 20M Rebar Works in Concrete
20M rebar strengthens concrete by resisting tension, distributing loads, and controlling cracking. Proper spacing, cover, and laps ensure bond and durability. When detailed and fabricated correctly, 20M bars deliver high capacity without excessive congestion in typical GTA structural elements.
Concrete excels in compression but needs steel for tension. 20M rebar pairs sufficient steel area with workable spacing in members like one-way slabs and deep beams. Key field variables—bar spacing, concrete cover, lap development, and bar supports—directly affect serviceability and durability.
Core mechanics you can rely on
- Bond and anchorage: Ribbed profiles develop tension through mechanical interlock with concrete paste and aggregate.
- Crack control: Distributed 20M steel limits crack widths by sharing tensile strain across multiple bars.
- Deflection management: Adequate steel area raises section stiffness; properly placed 20M reduces long-term sag under sustained loads.
- Durability: Specified cover shields steel from moisture and chlorides; epoxy coating adds another protective layer in aggressive exposure.
Field sequence that prevents rework
- Verify shop drawings and bar lists against issued-for-construction plans; flag clashes early.
- Stage bundles by pour sequence with clear tags; protect epoxy-coated bars from abrasion.
- Use chairs/bolsters to maintain cover; check bar marks, bends, and hook dimensions.
- Tie intersections per spec; keep laps and splices clear of openings and high-congestion zones.
- Document pre-pour checks: spacing, cover, splice length, and embed clearances.
Types, Coatings, and Alternatives to 20M
20M is available as black (uncoated), epoxy-coated for chloride exposure, and as glass fiber–reinforced polymer alternatives for select applications. When 20M isn’t ideal, adjacent sizes like 15M or 25M can meet design intent while resolving congestion or placement limits.
Choosing the right bar isn’t only about size. Exposure class, expected service life, carbonation/chloride risk, and constructability matter. Here’s how teams in Ontario usually think about options when 20M is on the table.
20M options
- Black (uncoated) 20M: The workhorse for interior or low-exposure concrete. Economical and straightforward to bend, tie, and place.
- Epoxy-coated 20M: Color-coded green in most yards. Helps resist chloride-induced corrosion near deicing salts, parking decks, podium perimeters, and bridge approaches.
- GFRB (FRP) alternatives: Non-rusting, electrically non-conductive, and lightweight. Often used in highly corrosive or magnetically sensitive zones; design and detailing differ from steel.
When to consider adjacent sizes
- Consider 15M instead: Where bar congestion, tight bends, or thin cover make 20M impractical, a greater count of smaller bars can improve placement.
- Consider 25M instead: For heavy mats, transfer beams, or core walls where reducing total bar count and laps is paramount.
For welded wire reinforcement in slabs-on-ground, review mesh options as part of an integrated design. See our discussion of mesh types and uses in this welded wire mesh guide to align mesh with rebar placements.
Best Practices for Specifying and Installing 20M
The best approach is to coordinate early: finalize takeoffs, shop drawings, and delivery slots before formwork starts. Use chairs to hold cover, stage tagged bundles by pour, protect epoxy coatings, and verify laps and spacing with pre-pour checks to prevent delays and rework.
In our experience supporting GTA sites, small planning wins compound into days saved. The checklist below reflects lessons from residential towers, commercial podiums, and municipal infrastructure projects across Ontario.
Specification and detailing
- Confirm exposure class and select black vs. epoxy-coated 20M accordingly.
- Resolve lap splice zones away from openings and embed clusters.
- Detail bar supports (chairs/bolsters) to maintain cover through pours.
- Dimension bend radii, hooks, and couplers consistent with shop capability and site clearances.
- Issue bar lists with clear marks, piece counts, and bending schedules.
Fabrication and logistics
- Bundle by sequence; tag with bar mark, length, count, and location.
- Protect epoxy-coated bars during handling and transport to avoid damage.
- Book the delivery window against crane time and pour schedules.
- Stage pre-assemblies (mats/cages) where it reduces onsite labor.
On-site placement
- Use chairs and spacer blocks to maintain cover in all directions.
- Tie intersections per spec; avoid stacking laps in high-shear zones.
- Keep tolerances for spacing, cover, and alignment within accepted limits.
- Document pre-pour QA: spacing, cover, splice length, and clearances to MEP.
Local considerations for Woodbridge
- Coordinate early morning deliveries to avoid congestion near Highway 50 – Zum Queen Stop EB, especially on pour days.
- Plan for winter protection and heated enclosures; GTA freeze-thaw cycles impact curing and cover requirements.
- Align crane picks and trucking around peak times by Fogal Rd / Highway 50 to keep pours on track.
Tools and Resources Contractors Use
Use integrated takeoff and detailing tools, bar list templates, and coordinated delivery tracking to keep 20M rebar moving from shop to pour. Pair software with in-house expertise so drawings, bends, and tags match how your crew actually builds.
Dass Rebar’s teams support each step—estimating, detailing, fabrication, delivery, and assembly—so information flows cleanly from plan to field. These resources help project managers, supers, and foremen streamline reinforcing work.
Planning and takeoff
- Centralized takeoff templates for slabs, beams, and walls.
- Bar list formats with marks, piece counts, bends, and lap notes.
- Coordinated delivery schedules keyed to pour sequences.
Helpful guides from our network
- Align slab reinforcement with mesh strategies using our mesh types and uses overview.
- Where concrete and light-gauge steel meet, see cold-formed framing basics to coordinate interfaces.
- For public-sector readiness and reliability messaging, review this MTO-trust overview.
For a broader grounding in rebar across Ontario builds, our internal references cover supply, fabrication, and reinforcing steel fundamentals. See our rebar supply guide, compare fabrication options in the fabrication guide, and get context from the reinforcing steel guide.
Step-by-Step: Takeoff-to-Pour Workflow
A dependable 20M rebar workflow runs on clear drawings, accurate bar lists, predictable delivery windows, and disciplined pre-pour checks. Standardize the handoffs from estimating through assembly to shave days off the schedule and prevent site-wide knock-on delays.
Below is a practical process model we use to coordinate 20M rebar from our Woodbridge yard to jobs across the GTA and Ontario:
| Stage | What happens | Delivered by Dass Rebar | Field check |
|---|---|---|---|
| Estimating | Quantify 20M bars by member, exposure, and laps | Takeoff, preliminary bar list | Scope, alternates, and sequencing align with schedule |
| Detailing | Create shop drawings and bending schedules | Stamped drawings, marked lists | Clashes resolved; laps and hooks workable |
| Fabrication | Cut, bend, tag, and bundle by pour sequence | Labeled bundles, mats/cages if pre-assembled | Spot-check marks, lengths, coatings |
| Delivery | Stage loads to site windows and crane time | Trucking fleet, delivery tickets | Unloading plan, secure laydown, weather cover |
| Assembly | Place, chair, tie, and verify spacing and cover | On-site assembly support | QA checklist before pour |
For execution tips and coordination patterns we use daily, compare approaches in our suppliers guide and this concrete rebar guide that expands on pour sequencing.
Real Examples and Mini Case Studies
20M rebar frequently anchors GTA podiums, transfer zones, and core walls. When paired with accurate detailing and sequenced delivery, crews place faster and avoid congestion—keeping critical path activities like formwork and pours on track.
Our teams have supported dozens of Ontario projects where 20M played a central role. Here are condensed examples illustrating typical decisions and payoffs.
Podium slab with edge exposure
- Challenge: Salt exposure near access ramps created chloride risk.
- Decision: Epoxy-coated 20M top mats at perimeter bays; black 20M elsewhere.
- Outcome: Balanced durability and fabrication simplicity; clear tags kept staging smooth.
Transfer beam at residential tower
- Challenge: High demand and tight formwork limited bar count and lap zones.
- Decision: 25M at heavy zones; 20M elsewhere to control congestion and maintain cover.
- Outcome: Faster tying, fewer clashes at sleeves; pour met schedule.
Core wall reinforcement
- Challenge: Dense vertical steel with multiple embeds and openings.
- Decision: Alternating 20M with 25M around openings; lap splices relocated away from embed clusters.
- Outcome: Reduced rework; inspection passed on first visit.
Ontario projects in our portfolio
- Hawthorne Residences (Toronto): Coordinated podium mats with mixed coatings for durability.
- Hickory Terraces (Waterloo): Sequenced core wall cages, alternating 20M and 25M for constructability.
- The Grand at Universal City (Pickering): Transfer zones balanced 20M/25M to minimize congestion and keep forms on cycle.
Pricing and Procurement Factors (No Dollar Amounts)
Procurement success depends on clarity: finalize exposure class, coatings, bends, and sequencing early. Lock delivery windows against crane time, and keep alternates ready (15M/25M, mesh) to solve congestion without scope drift. Avoid last-minute changes that ripple through fabrication and logistics.
While we don’t list prices publicly, we can flag the main variables that influence quotes and lead times so you can plan schedules with confidence.
- Specification detail: Grade (400W/500W), coating (black/epoxy), bends, hooks, and lap strategy.
- Quantity and sequencing: Member-by-member breakdown, pour maps, and required pre-assemblies.
- Delivery constraints: Crane windows, laydown limits, road access, and night/early deliveries.
- Alternates and substitutions: Mesh zones, adjacent bar sizes (15M/25M), or GFRB in specific areas.
To align scopes quickly, many Ontario contractors start with our Ontario supplier guide and then loop in estimating and detailing for a coordinated quote and schedule.
Frequently Asked Questions: 20M Rebar
Contractors ask about 20M size equivalence, best uses, coatings, laps, and ordering steps. Here are direct answers you can act on now, plus links to guides that expand the details for Ontario projects.
What does 20M mean in rebar sizing?
20M is a Canadian metric designation with a nominal diameter near 19.5 mm and an area around 300 mm². It sits between 15M and 25M, offering higher capacity than 15M without the congestion risk that 25M can introduce in tight formwork.
Where is 20M rebar typically used?
You’ll see 20M in suspended slabs, transfer beams, shear and core walls, grade beams, and thicker footings. It’s popular across the GTA because it balances steel area with practical spacing, laps, and cover in mid- to heavy-duty members.
When should epoxy-coated 20M be specified?
Use epoxy-coated 20M in chloride exposure zones—parking structures, podium edges near traffic, or areas subject to deicing salts. The coating adds corrosion resistance. Protect the coating during handling and verify cover to maximize durability.
How do I order cut and bent 20M from Dass Rebar?
Share drawings and pour maps. We’ll deliver takeoffs, shop drawings, and marked bar lists. After approval, we fabricate, tag by pour, schedule our trucking fleet, and support on-site assembly to keep your pour dates intact.
Conclusion
20M rebar offers a smart mix of strength and constructability for Ontario projects. With coordinated takeoffs, detailing, fabrication, and delivery from a single partner, you minimize congestion, prevent rework, and keep pour dates. That’s the path to predictable schedules and durable structures.
Here’s what to remember as you plan your next slab, wall, or beam that may call for 20M:
Key takeaways
- 20M’s nominal diameter (~19.5 mm) and area (~300 mm²) fit mid- to heavy-duty members.
- Pick coatings by exposure: black for interior, epoxy near chlorides; consider GFRB for special cases.
- Prevent congestion with early detailing, sequenced bundles, and disciplined pre-pour QA.
- Lock delivery windows to crane time; stage mats/cages to save onsite labor.
- Use a repeatable workflow from takeoff to pour to avoid schedule slips.
Next step: If you’re aligning specs or pour dates now, connect with our team. Start with our rebar supply guide and loop in detailing and fabrication for a streamlined plan.
Soft CTA: Need 20M rebar on request? Our Woodbridge yard coordinates estimating, detailing, fabrication, delivery, and assembly across Ontario. Book a quick coordination call and keep your next pour on schedule.