
Rebar detailing drawings are shop drawings that turn structural intent into exact bar marks, bends, lengths, splices, and placement instructions. For projects in 370 New Enterprise Way and across Ontario, Dass Rebar uses in-house detailing, fabrication, and coordinated delivery to keep pours on schedule and reduce rework.
By Navjot Dass — Dass Rebar | Last updated: 2026-05-26
Summary & Table of Contents
This guide explains what rebar detailing drawings are, why they matter, and how to produce constructible, code-ready shop drawings. You’ll learn the complete workflow, key drawing types, best practices, and real Ontario examples—so your team can pour on time with fewer RFIs and zero surprises.
Use this complete guide to plan, review, and coordinate rebar detailing drawings from RFQ to pour. We focus on Ontario workflows that general contractors, concrete crews, and developers use daily.
- What rebar detailing drawings are and who uses them
- Why drawings drive schedule, safety, and compliance
- Step-by-step detailing-to-delivery workflow
- Drawing types: plans, sections, isometrics, bar lists
- Best practices: bar marks, cover, laps, chairs, embeds
- Tools, standards, and file formats for submittals
- Ontario case studies from multifamily and mixed-use
What Are Rebar Detailing Drawings?
Rebar detailing drawings are precise, fabrication-ready shop drawings that convert engineering design into bar lists, bend shapes, splice data, and placement diagrams. They guide cutting, bending, tagging, delivery, and installation—reducing RFIs and field errors while aligning the engineer’s design with constructible site conditions.
At their core, rebar detailing drawings translate structural notes into exact, buildable instructions. They connect the engineer’s model, code requirements, and field realities so crews can install confidently.
- Core deliverables: placement plans, sections and details, bar bending schedules (BBS), bar lists, splice and lap tables, bar marks and tags, pour sequence notes.
- Primary users: fabricators, site supers, foremen, inspectors, and project managers who must align procurement, delivery, and placement.
- Where Dass Rebar fits: our in-house shop drawings team coordinates with estimating, fabrication, and trucking so your drawings match what gets delivered—down to the last chair.
In our experience supporting Ontario pours, clear bar marks and unambiguous section cuts prevent rework. Callouts for cover, laps, and hooks save hours on deck and reduce inspection callbacks.
Why Rebar Detailing Drawings Matter
Accurate rebar drawings drive schedule reliability, material optimization, and inspection readiness. They reduce field conflicts, minimize waste, and ensure the delivered steel matches the approved submittal—keeping pours on time and compliant for residential, commercial, and infrastructure work.
Drawings are the single source of truth for procurement, fabrication, and placement. When they’re right, everything downstream flows.
- Schedule control: fewer RFIs and clear pour sequencing keep crews productive. Coordinated drawings shorten approval cycles and support predictable delivery windows.
- Less waste: optimized cut lists and splice logic reduce offcuts and on-deck trimming.
- Inspection-ready: explicit cover, chair spacing, and epoxy/coating notes align with inspection checklists used on Ontario sites.
- Product integration: call out epoxy-coated bars, welded wire mesh, and GFRB where the spec requires corrosion resistance, crack control, or non-conductive reinforcement.
Teams we support across the GTA often point to one truth: good drawings prevent delays. For a deeper look at logistics and pour timing, see the discussion on why timely rebar delivery matters.
How Rebar Detailing Works: Step-by-Step
The rebar detailing workflow runs from intake and estimating to detailing, coordination, fabrication, delivery, and on-site assembly. Each stage updates the submittal set and bar lists so what’s installed matches the approved drawings and the truck manifest—no surprises at the pour.
Here’s a practical field-tested flow we run for Ontario projects:
- Intake and scope lock: gather structural drawings, specs, addenda, and pour breaks. Confirm grade (e.g., 400W/500W), coatings, and mesh gauges.
- Estimating alignment: quantities and prelim splice strategy are reviewed with our estimating team for takeoff accuracy and early risk flags.
- Detailing and BBS: produce shop drawings, bar marks, and a bar bending schedule with clear laps, hooks, and chair/spacer conventions.
- Coordination: resolve collisions with openings, embeds, sleeves, and MEP penetrations. Mark pour sequences and construction joints.
- Submittal and approval: issue PDFs/DWG for review. Track revisions and RFIs; update bar lists accordingly.
- Fabrication: cut and bend per BBS, tag bars, and palletize by area and pour sequence in our fabrication workflow.
- Delivery and assembly: coordinate drop times and crane picks. Our supply and delivery process matches drawings and pack lists so crews install with minimal sorting.
On most residential cores and parkade decks, this end-to-end approach eliminates on-deck guesswork. When bar tags, pack lists, and detail callouts agree, placement moves fast and inspections are straightforward.
Types, Methods, and Approaches
Rebar detailing drawings bundle placement plans, sections, elevations, and isometrics with bar lists and bending schedules. Each view clarifies location, cover, laps, and embed coordination so fabricators and installers can execute the engineer’s design without field interpretation.
Most complete submittals combine multiple view types and schedules. Use these methods intentionally to remove ambiguity:
- Plan views: show bar runs, spacing, and pour breaks; ideal for slabs, mats, and decks.
- Sections and details: clarify cover, laps, hooks, and step changes at beams, walls, and foundations.
- Elevations and isometrics: helpful for shafts, cores, stairs, and complex bar cages where 3D relationships matter.
- Bar lists and BBS: the procurement backbone—marks, diameters, lengths, shapes, quantities, coating, and notes.
- Splice tables: consolidate lap locations and lengths; reduce repeated notes across drawings.
Typical elements by concrete member
- Foundations/mats: top/bottom mats, edge bars, shear keys, dowels to walls, chairs/spacers.
- Walls/cores: vertical bars, horizontals, coupling/splices, openings, embeds and MEP sleeves.
- Beams/columns: longitudinal bars, stirrups/ties, hooks, bar congestion at joints.
- Slabs/decks: main bars, distribution, drop panels, shrinkage/crack control mesh.
Materials that must be explicit
- Grade and size: 400W/500W; common 10m, 15m, and 20m bars called out where designed.
- Coatings: epoxy-coated bars for exposure/corrosion; note handling requirements.
- Alternates: welded wire mesh in 6x6x6/6, 6x6x9/9, or 6x6x10/10; GFRB for non-conductive or corrosion-sensitive zones.
When drawings pair clean views with a disciplined BBS, fabrication and deck setup become repeatable routines rather than one-off puzzles.
Best Practices for Constructible, Code-Ready Drawings
Use consistent bar mark logic, explicit cover and lap notes, and clear revision control. Show chairs, embeds, and pour breaks. Coordinate openings and sleeves. Provide a disciplined BBS so shop tags, pack lists, and drawings match—accelerating installation and inspection.
Constructibility lives in the details. These practices keep Ontario jobs moving:
- Bar marking system: simple, logical, and stable across revisions (e.g., Wxx for walls, Sxx for slabs).
- Cover and laps: note minimum cover at all faces; provide lap lengths by bar size and location; show lap staggering where congestion risks exist.
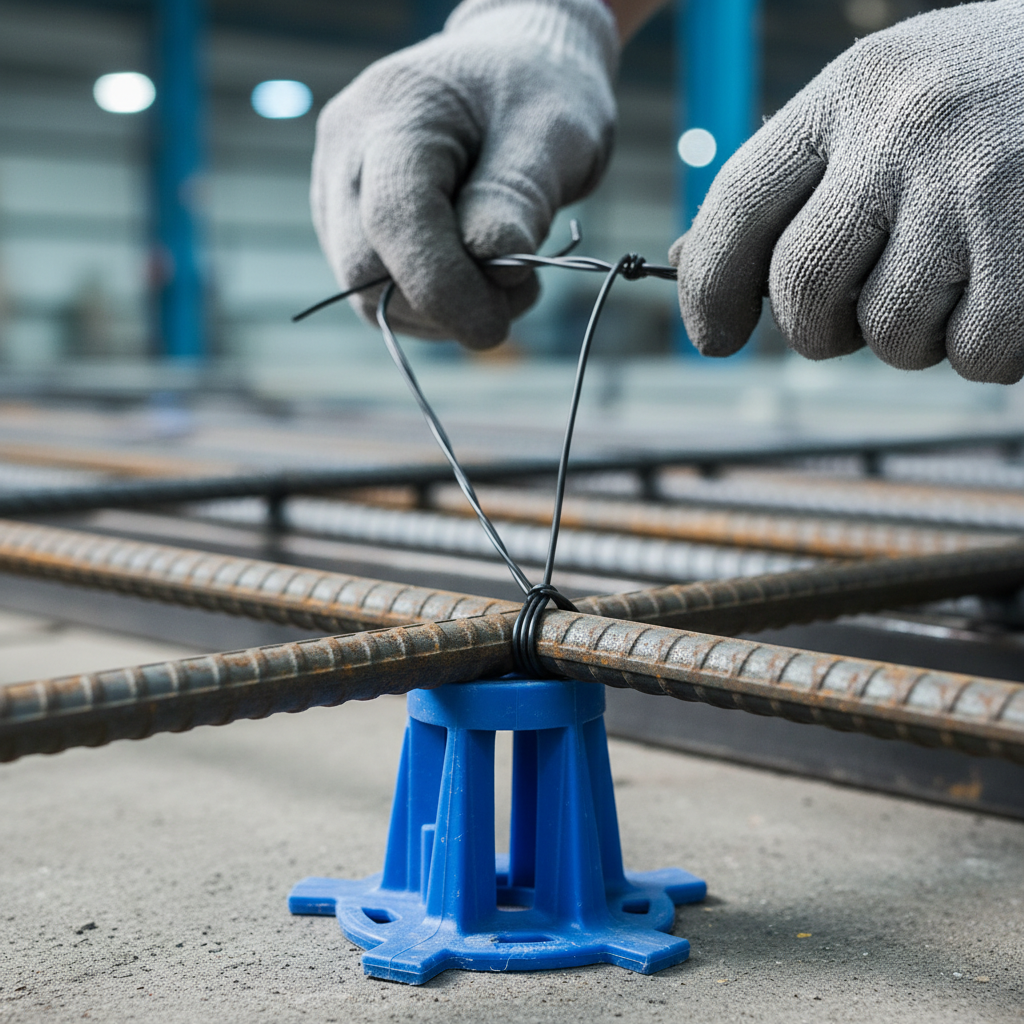
- Chairs and spacers: indicate type and spacing; call out plastic chairs under epoxy-coated bars and cover blocks for mats.
- Embeds and sleeves: dimension from consistent datums; detail edge distances; show bar trimming or local congestion relief where needed.
- Revision control: cloud and date changes; update BBS and pack lists; re-issue only impacted sheets to speed approvals.
- Inspection aids: add quick legends and typical details inspectors expect to see on Ontario jobs.
Field-proven notes to include
- Placement sequence: label pours A/B/C and provide deck start points to reduce material shuffling.
- Handling and coating: for epoxy-coated bars, specify non-metallic slings and padded forks; avoid field cuts where possible.
- Mesh transitions: show laps and alternates where welded mesh interfaces with loose bars.
We’ve found that a single page of “typical notes” attached to every submittal saves hours of repetition and reduces misreads in the field.
Tools, Standards, and File Formats
Successful detailing stacks reliable CAD/BIM tools with disciplined document control. Deliver PDF for approval, DWG for coordination, and a bar schedule in spreadsheet or ERP format. Align to recognized standards and keep one controlled submittal set as the project’s truth source.
The right tools and standards make coordination smoother across teams.
- CAD/BIM workflow: use a consistent template, title blocks, and layer conventions so revisions remain traceable.
- File formats: PDF for stamps/approvals; DWG for coordination; BBS/CSV for fabrication systems.
- Packaging: one combined submittal with an index, revision history, and member-by-member tabs or bookmarks.
- Distribution: document portal with version control; read receipts for critical updates.
2D plans vs 3D isometrics vs schedules
| Format | Best for | Pros | Watch-outs |
|---|---|---|---|
| 2D plans/sections | Slabs, mats, typical walls | Fast to read; compact sheets | Can hide congestion without sections |
| 3D isometrics | Cages, stairs, cores | Great spatial clarity | Heavier files; more drafting time |
| Bar schedules (BBS) | Procurement/fabrication | Exact quantities and bends | Must stay synced to sheets |
However you package drawings, keep one controlled submittal as the reference. That single source slices days off coordination.

Case Studies and Examples from Ontario
Coordinated rebar shop drawings shorten approvals and simplify deck work. These Ontario examples show how integrated detailing, fabrication, and delivery reduced RFIs and helped inspectors verify cover, laps, and coatings quickly on residential and mixed-use sites.
Our team supports residential, commercial, and municipal pours across the GTA with detailing that mirrors field reality.
- High-rise core walls (Toronto): for a downtown residential tower, aligned lap staggering and coupling notes reduced congestion at door openings. Approval cycled in days, not weeks.
- Mid-rise with welded mesh (Waterloo): decks used 6x6x9/9 mesh with loose bars at penetrations. Drawings flagged sleeve clusters so crews pre-cut mesh cleanly.
- Mixed-use (Pickering): detailed epoxy-coated perimeter bars at exposed edges with chair notes for protection. Inspectors cleared cover checks on the first pass.
Each package linked bar marks to pack lists, so the crane placed the right bundles near start points. That one practice kept crews setting steel instead of hunting tags.
For broader context on Ontario project work, explore these Ontario rebar project notes.
Local considerations for 370 New Enterprise Way
- Plan deliveries to avoid regional rush hours. Stagger crane picks so packs land near the day’s deck start point.
- Ontario winters demand clear cover notes and heated pour sequencing. Detail spacer types suited to cold-weather curing.
- Coordinate epoxy-coated handling and storage under tarps. Keep tags legible and off the ground to protect coatings.
Field Standards, Tips, and Checklists
Turn drawings into action with short, repeatable checklists: scope lock, detail review, embed coordination, BBS sync, and delivery staging. When each item is verified, crews spend time placing steel—not interpreting prints or chasing missing bars.
Use these quick-hit lists at milestones.
Before detailing starts
- Confirm grades (400W/500W), coatings, bar sizes (10m/15m/20m), and mesh gauges.
- Collect structural notes, pour breaks, and sleeve/MEP layouts.
- Agree on bar mark convention, title block, and sheet index.
During detailing
- Section every congestion risk. Show cover at all faces.
- Lock splice locations and lengths. Stagger laps to avoid clash.
- Dimension embeds and sleeves to consistent datums.
Before fabrication
- Sync BBS to latest revision. Cloud and date changes.
- Export pack lists by area and pour sequence.
- Flag epoxy-coated and GFRB handling separately.
Delivery and on-deck
- Stage packs by crane pick order. Keep tags visible.
- Verify chairs/spacers and cover blocks are on site.
- Walk the deck with drawings to confirm start points and pour limits.
This is where integrated services help. Our detailing, steel supply guidance, and fabrication process align so crews don’t slow down waiting for clarifications.
Integration with Products and Specs
Strong drawings specify grade, size, coating, and alternates in one place. Call out 400W/500W bars, epoxy-coated requirements, mesh gauges, and any GFRB. Make sure the BBS and pack lists carry those notes, so shop tags and delivery paperwork reflect the spec.
We keep materials explicit on the sheets and in schedules.
- Grades and sizes: reference 10m, 15m, and 20m bars where designed; keep a consistent size legend.
- Coatings: epoxy-coated bars labeled at mark and schedule level; add handling/storage notes.
- Mesh: welded wire mesh in common gauges (6/6, 9/9, 10/10) with lap notes and placement diagrams.
- Alternates: when GFRB is approved, identify tie locations and non-metallic supports.
When spec notes live only in emails, they’re lost on deck. Keep them on the drawings and in the BBS—every time.
Quality Control and Inspection Readiness
Inspection-ready drawings make cover, laps, chair spacing, and coating requirements unmistakable. Add simple legends and typical details so inspectors can verify quickly. When bar tags and pack lists match the drawings, verifications take minutes, not hours.
QC starts in detailing and continues through delivery.
- Legends and notes: standardize symbols for laps, hooks, chairs, and epoxy-coating.
- Pre-pour walk: use the drawings to confirm cover blocks, chair spacing, and embed offsets.
- Tag checks: confirm that load tags match the BBS and submittal sheet bar marks.
- Photo records: capture critical sections prior to pour for close-out packages.
Teams using this rhythm see fewer last-minute adjustments and smoother inspections—especially on tight downtown sites where every hour matters.
Coordinating Embeds, Openings, and Sleeves
Embed and sleeve coordination lives best on the rebar drawings, not in a separate silo. Dimension to consistent datums, show clearances, and indicate local trimming or bar shifts. That clarity prevents on-deck clashes and last-minute core drilling.
We place these realities front and center on sheets:
- Datums: measure all penetrations from gridlines or control lines noted on every sheet.
- Clearances: provide minimum distances from openings to bars and edges; flag congestion hotspots.
- Local adjustments: detail trimming or alternate bars to maintain cover without starving reinforcement.
When embeds and sleeves are visible on the rebar sheets, crews stop guessing and start placing.
Delivery Logistics and Staging
Align delivery windows, pack lists, and crane picks to the pour sequence shown on the drawings. Stage bundles near start points and keep tags legible. That alignment removes on-deck sorting and keeps bars flowing to the deck without delays.
Logistics makes or breaks placement speed.
- Pack by area: mirror drawing zones (e.g., grid quadrants or pour breaks) so bundles land where work begins.
- Crane choreography: coordinate picks to set heavy bundles furthest first; avoid double-handling.
- Weather readiness: tarp epoxy-coated bundles; maintain tag visibility.
For more on planning the handoff between shop, truck, and deck, review our overview on MTO-ready reinforcing workflows.
Need a fast, practical review?
Send your latest submittal set for a quick constructibility scan. We’ll flag cover, laps, embeds, and staging risks—and confirm that your BBS and pack lists align—so you can pour with confidence.
If you want a second set of eyes before you pour, share your package with our shop drawings team. We’ll provide a concise, field-first checklist tailored to your member types.
Frequently Missed Details (and How to Avoid Them)
Most issues come from ambiguous laps, missing cover notes, and uncoordinated sleeves. Solve them by sectioning congestion, standardizing lap tables, and dimensioning embeds to clear datums. Keep the BBS synced to the latest revision to avoid fabricating the wrong bars.
- Ambiguous lap lengths: publish a lap table by bar size/member; stop burying values in notes.
- Hidden congestion: add sections at openings and edge thickenings where laps and hooks pile up.
- Unlabeled chairs: specify chair type/spacing; inspectors look for it.
- Out-of-sync BBS: re-export bar lists after every revision; retire old sheets from the portal.
Fix these four and you’ll avoid most rework on typical Ontario decks and walls.
How Dass Rebar Integrates Detailing, Fabrication, and Delivery
We pair in-house estimating and detailing with fabrication, trucking, and on-site assembly. That end-to-end model keeps drawings, BBS, tags, and delivery paperwork consistent—so installers follow the plan, inspectors verify quickly, and schedules hold.
Here’s how the pieces fit together for Ontario projects:
- Estimating: early takeoffs catch spec gaps and flag risk areas for detailers.
- Detailing: shop drawings reflect actual field constraints and embed/sleeve realities.
- Fabrication: bars are cut, bent, and tagged by area and sequence.
- Delivery: our dedicated fleet meets tight downtown windows and regional routes.
- Assembly: crews install per drawings; RFIs drop, inspections accelerate.
If you’re balancing multiple GTA sites, an integrated partner simplifies coordination. When drawings drive the process, everything else aligns.
FAQ: Rebar Detailing Drawings
These quick answers cover the most common questions about rebar detailing drawings: what they include, how approvals work, how they reduce RFIs, and how integrated detailing-fabrication-delivery keeps pours on time across Ontario.
What do rebar detailing drawings include?
They include placement plans, sections and details, bar marks, a bar bending schedule (BBS), splice and lap tables, and clear notes for cover, chairs, embeds, coatings, and pour sequencing. The package guides fabrication, delivery, and installation.
How do drawings reduce RFIs and delays?
Clean sections at congestion points, explicit lap and cover notes, and coordinated sleeves/embeds remove ambiguity. When bar lists and tags match the latest revision, crews stop guessing and inspectors verify faster—cutting RFI volume and schedule slip.
Which materials should be called out explicitly?
Call out grades (400W/500W), sizes (10m/15m/20m), coatings (epoxy where specified), welded wire mesh gauges (6/6, 9/9, 10/10), and approved alternates such as GFRB. Ensure these notes appear both on sheets and in the BBS.
How do you keep drawings and bar lists in sync?
Use disciplined revision control. After every approved change, cloud updates on sheets, regenerate the BBS, retire outdated files from the portal, and reissue pack lists. Consistency across drawings, tags, and delivery manifests prevents field mistakes.
Key Takeaways
Treat rebar drawings as the coordination hub: lock scope, detail congestion, sync the BBS, and stage deliveries by sequence. When drawings, tags, and packs agree, crews place faster, inspectors verify quickly, and schedules hold across Ontario jobs.
- Use one controlled submittal set as the truth source.
- Show cover, laps, chairs, embeds, and pour breaks explicitly.
- Keep BBS, tags, and pack lists synced to the latest revision.
- Stage delivery to match drawing zones and start points.
- Call out materials clearly: grade, size, coatings, mesh, alternates.
Conclusion & Next Steps
If you want fewer RFIs and faster pours, start with clearer rebar detailing drawings. Align drawings, schedules, and delivery, and the deck moves. Dass Rebar integrates detailing, fabrication, delivery, and assembly for Ontario projects that need predictable timelines.
Ready to tighten your next pour window? Explore our process and resources:
- Learn how our rebar supply and delivery aligns with detailing and pack lists.
- Review our estimating guidance to lock scope early.
- See how shop drawings turn specs into installable plans.
- Check our foundation detail tips for mat and wall transitions.
Book a coordination review for your upcoming pour in 370 New Enterprise Way. We’ll help you align drawings, BBS, and delivery so crews can install with confidence.