Rebar and wire mesh are the two primary steel reinforcements used to control cracking and add tensile capacity in concrete. For projects in 370 New Enterprise Way (Woodbridge, ON) and across Ontario, choosing the right reinforcement early prevents callbacks, improves finish quality, and keeps pours on schedule. This guide explains how to pick, detail, and place each option.
By Navjot Dass • Last updated: May 20, 2026
Quick overview
Rebar delivers directional strength and anchorage for slabs, walls, and footings, while welded wire mesh (WWM) provides distributed crack control across wide areas. Use bars for structural loads, concentrated stresses, and anchorage; use mesh for temperature-shrinkage control and uniform restraint. Pair both when slabs need crack control and load paths.
This complete, Ontario-focused guide helps busy site teams and estimators move fast with fewer errors.
- What rebar and wire mesh are, and when each is best
- How spacing, cover, and bar size affect performance
- Fabrication, detailing, delivery, and assembly workflows
- Common field mistakes to avoid on slabs, walls, and footings
- Checklists, tables, and practical specs you can use today
Local considerations for 370 New Enterprise Way
- Plan reinforcement around freeze–thaw cycles: April–June and September–October pours often see 15–20°F swings week to week, affecting shrinkage and curing schedules.
- Book deliveries to avoid regional rush hours; a 30–45 minute buffer helps keep ready-mix and rebar trucks sequenced correctly on GTA corridors.
- For municipal and infrastructure work, confirm MTO-compliant grades and epoxy-coated options before shop drawings so procurement and inspection align.
What is rebar and wire mesh?
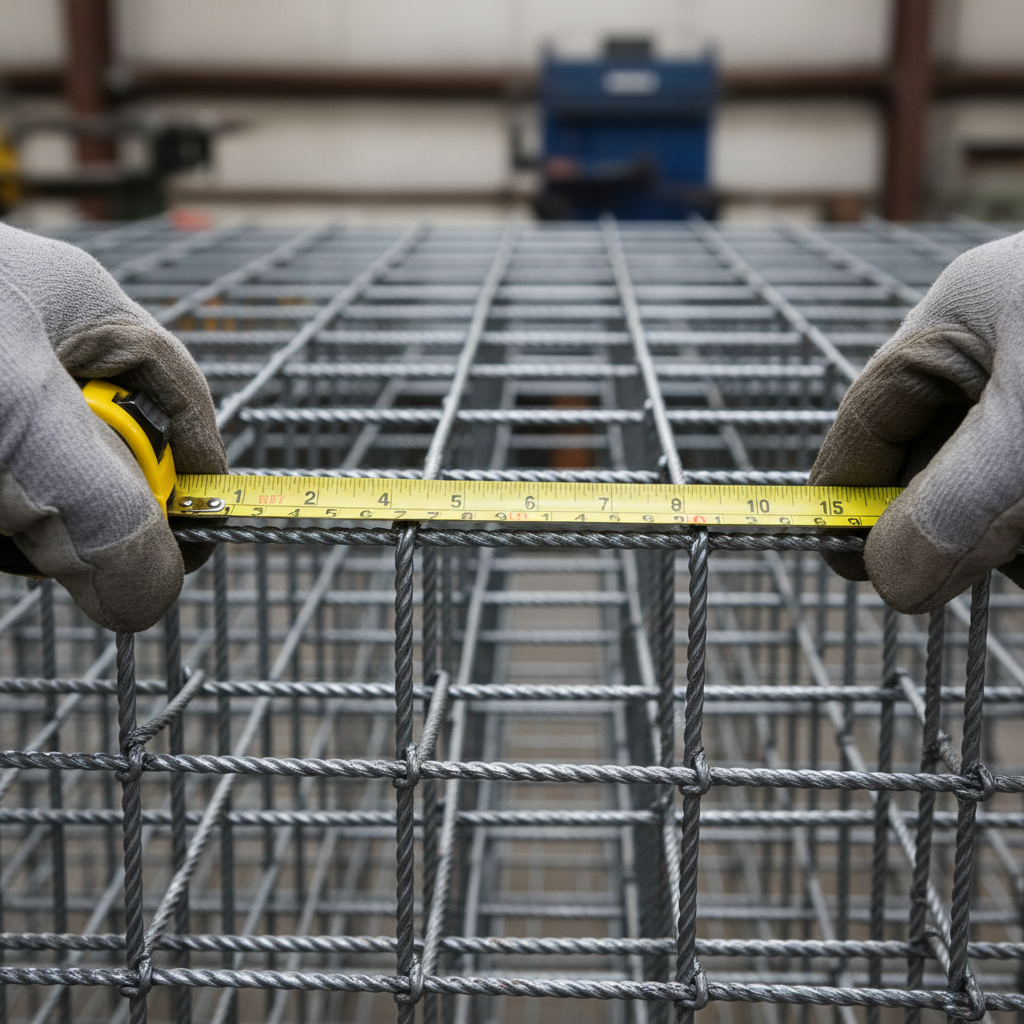
Rebar is deformed steel bar (commonly 400W/500W in Ontario) that provides tensile strength and anchorage along defined load paths. Welded wire mesh is a factory-welded grid (often 6×6 with 6/6, 9/9, or 10/10 wires) used to distribute shrinkage and temperature stresses uniformly across slabs and pavements.
At Dass Rebar, we stock Grade 500W and 400W reinforcing steel, plus welded wire mesh in 6×6 grids with 6/6, 9/9, and 10/10 wires. Bars and mesh solve different problems: bars carry concentrated loads and provide hooks, laps, and anchorage; mesh excels at distributed crack control.
- Typical strengths: 400 MPa (~58 ksi) and 500 MPa (~72.5 ksi).
- Common bar sizes in Ontario: 10m (~11.3 mm diameter), 15m (~16 mm), 20m (~19.5 mm).
- Mesh panels often measure 8 ft × 20 ft; rolls are used for some light-duty applications.
- Cover drives durability: 40–75 mm (1.5–3 in) is common depending on exposure and member type.
For a deeper foundation primer, see our steel rebar guide and the Ontario-focused notes in our rebar supply guide.
Why rebar and wire mesh matter
The right reinforcement limits crack width, controls deflection, and protects service life. Poor selection or placement increases shrinkage cracking within 24–72 hours, invites corrosion, and accelerates repair cycles. Matching bar size, spacing, and cover to loads and exposure is the fastest way to avoid callbacks.
Concrete is strong in compression but weak in tension. Rebar and wire mesh add the tensile path that concrete lacks. In our experience supporting GTA crews, early choices around spacing (e.g., 12 in vs 18 in), cover (e.g., 2 in vs 3 in), and laps (e.g., 40db in tension zones) show up later as either clean slabs or persistent random cracking.
- Crack control: Keeping crack widths under about 0.3 mm helps appearance and durability.
- Serviceability: Bars reduce mid-span deflection in beams and suspended slabs by noticeable percentages when sized and spaced correctly.
- Durability: Extra cover (e.g., +10–15 mm) matters in deicing-salt exposure zones along busy routes.
Need help translating loads and exposure into bar schedules? Our in-house teams handle fabrication and coordination so field placement is straightforward.
How reinforcement works in concrete
Rebar resists tension where concrete would crack: bottom steel in positive-moment regions, top steel over supports, and ties for confinement. Wire mesh distributes microcracks by restraining shrinkage, especially near slab surfaces. Both rely on proper cover, development length, and placement at the correct depth.
Mechanically, deformations on bars create bond with the paste. Development length increases with bar size and decreases with higher bond and confinement. As a practical field rule, tension lap splices near mid-span often target about 40 bar diameters, while compression splices can be shorter. Chairs and spacers keep steel at design depth so the effective lever arm is preserved.
| Use case | Prefer Rebar | Prefer Wire Mesh |
|---|---|---|
| Footings and grade beams | Yes: bars provide anchorage, hooks, laps | Rarely: mesh lacks bend details for corners |
| Light commercial slabs | Sometimes: added bars at joints/load paths | Yes: 6×6 6/6 or 6×6 9/9 for crack control |
| Suspended slabs | Yes: directional reinforcement required | Supplemental only |
| Drive lanes, high wheel loads | Yes: bars at known wheel paths | Supplemental only |
| Large flatwork areas | Edge/re-entrant bars as needed | Yes: distributed crack restraint |
If your slab needs both crack control and directional strength, pairing mesh (for general restraint) with strategic bars (at columns, openings, and heavy racks) is often the most reliable mix.
Types of reinforcement and when to use each
Use 10m, 15m, and 20m deformed bars for most Ontario slabs, walls, and footings; choose 500W when higher tensile capacity or reduced spacing is desired. Specify welded wire mesh 6×6 with 6/6, 9/9, or 10/10 wires to control shrinkage. Consider epoxy-coated bars in deicing or marine exposure zones.
Because stock availability affects schedules, we keep commonly used bar sizes and mesh on hand. That reduces lead time by days and stabilizes sequencing with ready-mix. Here’s a quick field-oriented catalog you can apply directly to takeoffs and pour planning.
Deformed steel bars (500W/400W)
- Strength: 500 MPa (~72.5 ksi) and 400 MPa (~58 ksi).
- Common sizes: 10m (~11.3 mm), 15m (~16.0 mm), 20m (~19.5 mm).
- Typical spacing in slabs: 300–450 mm (12–18 in) on center depending on slab thickness and loads.
- Covers: ~40 mm (interior), ~50–75 mm (exterior/freeze–thaw or deicing exposure).
- Hooks: 90°/135° standard with lengths per bar diameter; maintain clearances at corners.
We often see 10m bars at 300 mm on center for light commercial slabs, with additional 15m bars at re-entrant corners and openings.
Epoxy-coated steel bars
- Use in chloride exposure: parking decks, road-adjacent slabs, bridge approaches.
- Handling: use coated tie wire and padded supports; avoid coating nicks larger than ~0.5 in.
- Field repairs: approved epoxy touch-up kits are standard; follow manufacturer film thickness ranges.
Where inspectors require coated reinforcement, aligning shop drawings with procurement and delivery prevents on-site substitutions and re-inspection delays.
Welded wire mesh (WWM)
- Standard configurations: 6×6 grid with 6/6, 9/9, or 10/10 wire sizes.
- Panel size: commonly 8 ft × 20 ft; overlap laps by at least one full grid (e.g., 6 in) each way, or as specified.
- Placement: center-to-upper third of slab for shrinkage restraint near the surface where cracks start.
For a mesh-first overview with field photos, our mesh reinforcement primer covers handling, chairs, and finishing tips.
Glass Fibre Reinforcing Bars (GFRB)
- Non-corroding alternative for aggressive environments.
- Lower modulus than steel; deflection criteria often control spacing.
- Use manufacturer-specific development and lap rules; do not assume steel values.
Ask our team when GFRB makes sense. We’ll coordinate shop drawings so lap lengths and bends match the product’s datasheet.
Best practices that prevent callbacks
Keep steel at the correct depth, respect laps and hooks, and tie enough intersections to prevent float during placement. Sequence deliveries so mesh and bar crews stay ahead of the pump. Document cover, spacing, and laps before the first truck arrives.
In our Ontario projects, the winning pattern is simple: tight shop drawings, clear pre-pour checklists, and disciplined placement. Small numeric changes—like moving top steel from 20 mm to 50 mm cover in exterior slabs—change service life trajectories by seasons.
Pre-pour checklist (15-minute walk)
- Verify cover: 40–75 mm depending on exposure and member type.
- Confirm laps: tension splices often ~40db; compression often shorter per design.
- Check supports: chairs at 3–4 ft spacing; add bolsters under mesh lanes.
- Edge conditions: extra bars at re-entrant corners and around sleeves/openings.
- Crew sequencing: ensure at least 1–2 mesh lanes are placed ahead of finishing crew.
Placement tips that matter
- Mesh uplift: hook and pull mesh up during strike-off or pre-chair with continuous bolsters.
- Bar tying: tie every second intersection in light slabs; closer in congested cages.
- Clear spacing: keep ≥ 1.5× bar diameter or ≥ 1 in (whichever is larger) between adjacent bars.
- Rebar cover at edges: maintain ≥ 50 mm when slabs see deicing salts.
Our reinforcing steel guide condenses these rules into a printable field card. For custom site plans, our detailing team builds project-specific notes.
Inspection and documentation
- Photograph critical regions: laps, hooks, and dowel locations at 2–3 locations per bay.
- Mark elevation checks: top steel depth at mid-span and over supports matters to deflection.
- Track truck timing: spacing pours 20–45 minutes prevents cold-joint risk in warm weather.
Need a second set of eyes? Send us your bar schedules and slab notes. Our in-house estimating and detailing team will tighten laps, chairs, and placement sequencing so field crews move faster.
Explore options in our rebar supply guide or ask about epoxy-coated stock and mesh panel availability.
Tools, calculators, and resources
Use quick takeoff rules to move faster: convert 10m/15m/20m diameters to areas, translate grid spacing to steel ratios, and pre-check laps and cover. Pair this with shop drawings, a pre-pour checklist, and a delivery plan that sequences mesh and bars with ready-mix arrivals.
Here are lightweight tools and rules-of-thumb we see Ontario crews use daily. Plug them into your notebooks or tablets, then add project-specific values as needed.
- 10m ~ 11.3 mm (area ≈ 100 mm²); 15m ~ 16.0 mm (area ≈ 200 mm²); 20m ~ 19.5 mm (area ≈ 300 mm²).
- Steel ratio sketch: 10m @ 300 mm centers ≈ 0.33% in a typical 150–200 mm slab zone (illustrative).
- Development shortcut: tension laps often ~40db; increase near joints/openings if specified.
- Mesh laps: at least one full 6×6 grid (≈ 150 mm or 6 in) each way unless drawings say otherwise.
- Delivery cadence: aim for 20–45 minute drum arrivals in warm months; tighten in cool weather.
If you want a deeper on-spec catalog of rebar options beyond this field kit, see the product overview at Dass Metal rebar products for sizes and typical applications.
Case studies from Ontario jobs
Coordinated estimating, detailing, and delivery reduces rework and keeps pours tight. On residential and mixed-use projects, we see fewer random cracks and smoother finishes when mesh is chaired correctly and bars are spaced to match load paths at edges, openings, and column strips.
We support developers, general contractors, and concrete specialists across Ontario with MTO-approved products and coordinated logistics. Below are anonymized scenarios based on common build types our crews and partners handle every season.
- Mid-rise residential slab-on-grade: 6×6 6/6 mesh panels in 8 ft × 20 ft sheets, lapped by one grid, with 10m bars added at re-entrant corners and control joints at 12–15 ft. Chairs at ~4 ft keep steel within the top-third.
- Municipal walkway near deicing routes: epoxy-coated 10m top bars at 12 in centers with 50–75 mm cover, plus mesh for distributed restraint. Visible reduction in surface map cracking after first winter cycle.
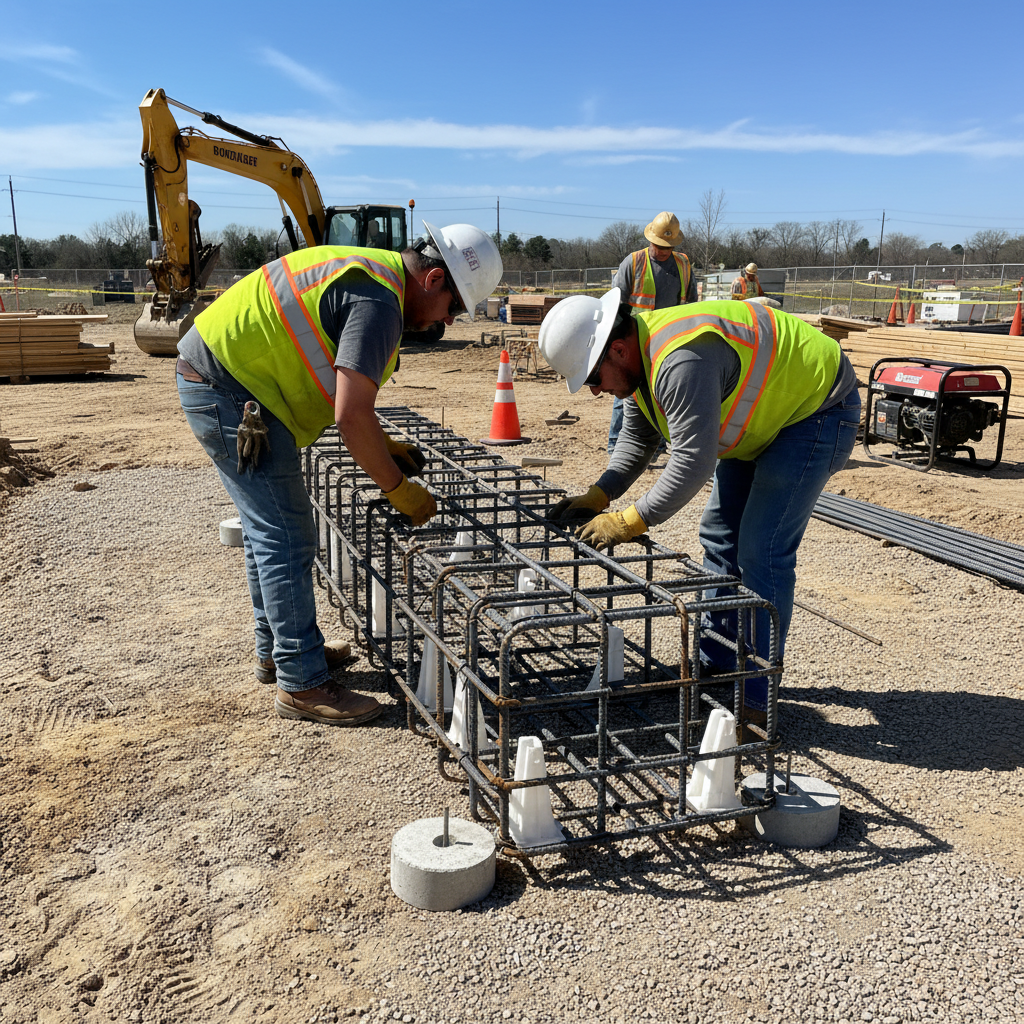
- Footing cages for a commercial pad: 15m longitudinal bars with 10m ties at 12 in; corner hooks detailed for continuity; elevations checked every 10–12 ft to hold bottom cover on compacted base.
For more foundational planning notes, skim our Ontario concrete rebar guide before you finalize pour sequences.
Frequently asked questions
Most slab-on-grade projects combine mesh for shrinkage restraint with selective bars at edges, openings, and heavy racks. Bars dominate in footings, beams, and suspended slabs. Keep steel at the right depth with chairs and respect laps and cover to limit crack width and protect service life.
Is rebar better than wire mesh for a concrete slab?
They solve different problems. Mesh provides uniform crack control across large areas, while rebar carries directional loads and offers anchorage at edges and openings. Many light commercial slabs use both: mesh for temperature-shrinkage restraint plus strategic bars at high-stress locations.
What size rebar is common in Ontario projects?
10m (~11.3 mm), 15m (~16.0 mm), and 20m (~19.5 mm) cover most slab, wall, and footing work. We stock Grade 400W (~58 ksi) and 500W (~72.5 ksi). Choose 500W if you want higher strength or to increase spacing without changing performance.
Where should mesh sit in the slab thickness?
Place it near the slab’s upper third for surface crack control, typically with 1.5–2 in cover in interior work and more in exterior exposures. Use chairs or continuous bolsters so the mesh doesn’t settle to the bottom during placement.
When do epoxy-coated bars make sense?
Use epoxy-coated steel in chloride and deicing environments—parking decks, roadway-adjacent slabs, and bridge approaches. Handle with coated wire and padded supports, and repair coating nicks with approved kits to maintain film thickness.
What’s special about 10m rebar?
10m (~11.3 mm diameter) is a flexible, commonly stocked size for slabs and light ties. It balances placement ease with meaningful area (~100 mm²). For deeper members or higher loads, step to 15m (~200 mm²) or 20m (~300 mm²) as detailing dictates.
Conclusion and next steps
Choose mesh for broad crack control, bars for load paths and anchorage, and epoxy-coated steel where chlorides threaten. Confirm spacing, laps, and cover on drawings; then chair and tie so steel stays put during the pour. The result is fewer random cracks and cleaner finishes.
- Key takeaways
- Mesh belongs near the top third; bars go where loads demand.
- Typical laps: tension ~40db unless drawings specify otherwise.
- Exterior covers: target 50–75 mm in freeze–thaw and deicing exposure.
- Sequence deliveries 20–45 minutes apart to maintain workability and joint quality.
Ready to lock this in for your next pour? Our teams handle estimating, detailing, fabrication, delivery, and on-site assembly across Ontario. Book a coordination review in 370 New Enterprise Way so we can align steel, mesh, and ready-mix timing before you mobilize.
Related articles in our rebar cluster
For deeper dives, our cluster covers rebar sizes, delivery logistics, and slab detailing. Start with 10m rebar uses, then review steel rebar basics and our rebar supply guide. For mesh-focused planning, see welded mesh reinforcement.
For additional context, you can also reference our broader network’s rebar product overview and topic collections like types, uses, and benefits and wire mesh applications.