Rebar reinforcing steel is the ribbed bar or mesh placed in concrete to carry tension and control cracking. In Ontario, common grades are 400W and 500W (500 MPa yield). From 370 New Enterprise Way in Woodbridge, Dass Rebar supplies, fabricates, and delivers MTO-compliant reinforcement so schedules stay predictable and structures remain safe.
By Navjot Dass · Last updated: June 14, 2026
Quick Summary
Reinforcing steel (rebar) strengthens concrete by resisting tension, controlling cracks, and anchoring loads. This guide explains grades (400W/500W), coatings (epoxy), alternatives (GFRP), welded wire mesh, and project workflows—from estimating and detailing to fabrication, delivery, and on-site assembly—using Dass Rebar’s Ontario experience as practical context.
Use this overview to orient your team. Then dive into the sections that match your current phase.
- Understand how steel and concrete work together
- Pick the right grade, size (10M/15M/20M), and coating
- Apply estimating, detailing, and QA best practices
- Plan fabrication, delivery windows, and staging
- See real Ontario examples you can model
What Is Rebar Reinforcing Steel?
Rebar reinforcing steel is deformed steel bar or welded wire mesh embedded in concrete to carry tension and limit crack widths. Standard Ontario grades include 400W and 500W, specified by yield strength. Proper detailing, placement, and cover integrate the steel so concrete performs safely under service and ultimate loads.
In plain terms, concrete handles compression well; steel handles tension. When paired correctly, you get durable, economical structures. In our experience supporting developers and concrete contractors across Ontario, the difference between a smooth pour and a rework day often comes down to good rebar planning.
- Terminology, simplified
- 10M/15M/20M: Metric size designations commonly used in Canada
- W: Weldable grade (e.g., 500W = ~500 MPa yield strength)
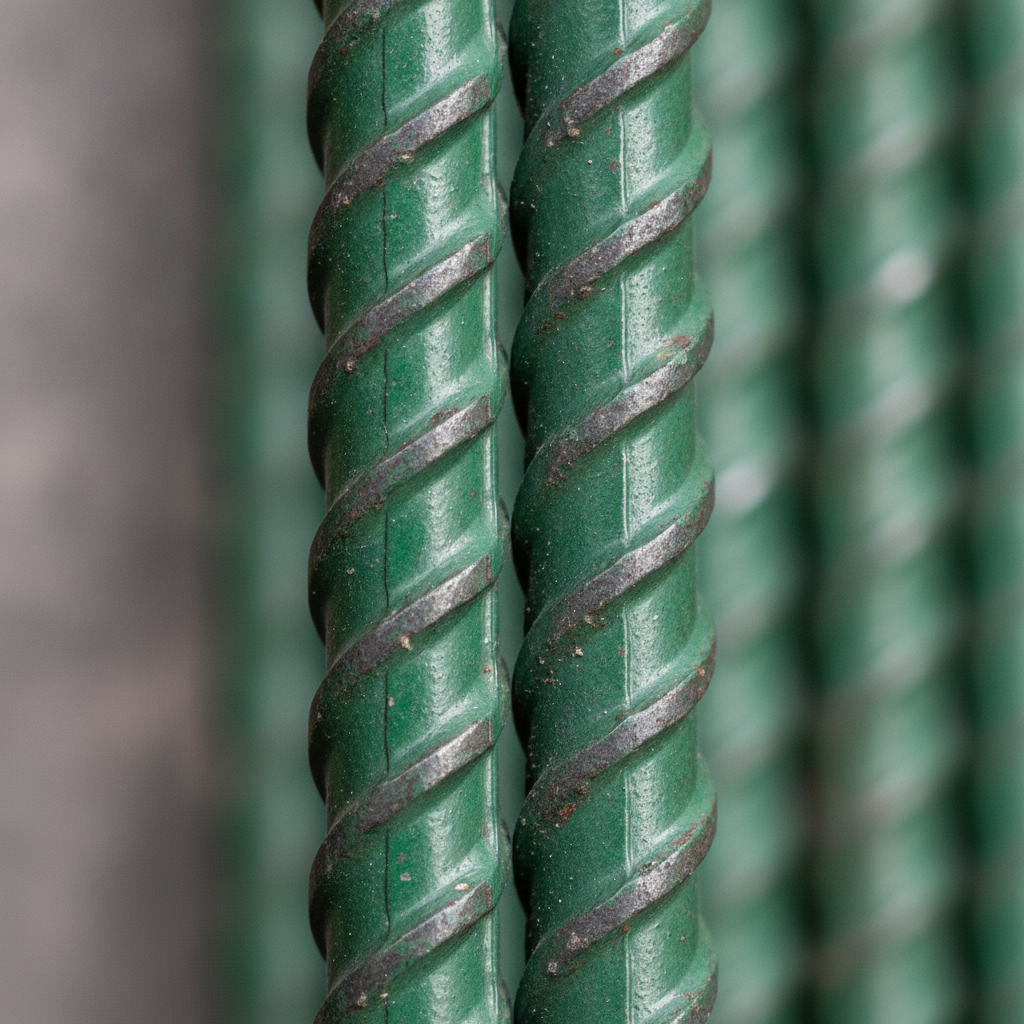
- Epoxy-coated: Green coating that improves corrosion resistance
- GFRP: Glass Fiber Reinforced Polymer bars used in corrosive environments
- Why it matters: Correct reinforcement selection and placement reduce crack widths, limit deflection, and extend service life.
Why Reinforcing Steel Matters for Concrete Performance
Reinforcing steel matters because it carries the tension concrete can’t. For contractors in Woodbridge and the broader Regional Municipality of York, correct rebar selection and placement limit cracking, protect durability, and keep inspections moving—all of which reduce schedule risk and callbacks.
Here’s the thing: once concrete cures, errors get expensive to fix. We’ve found that disciplined workflows—accurate takeoffs, buildable shop drawings, labeled bundles, and on-time trucks—cut wasted hours dramatically on residential, commercial, and infrastructure sites.
- Serviceability: Rebar controls crack widths so slabs and walls meet appearance and watertightness expectations.
- Strength: Proper steel area and anchorage deliver design capacity with safety factors.
- Durability: Bar cover and coatings protect against corrosion, which preserves capacity over time.
- Inspectability: Clear spacing and bar marks help crews and inspectors verify compliance quickly.
How Reinforcing Steel Works in Concrete
Steel and concrete act as a composite. Concrete resists compression; steel resists tension. Deformed ribs transfer shear to lock the two materials together. With adequate cover and anchorage, the composite section achieves the strength and crack control your engineer designed.
Mechanically, the deformations on rebar create bond with surrounding concrete. Under bending, the tension face yields first; the steel carries that demand. Proper lap splices or mechanical couplers develop full strength between bars. Clear cover shields steel from chloride and moisture ingress.
- Key data points
- Grade 500W: nominal 500 MPa (approx. 72.5 ksi) yield strength
- Grade 400W: nominal 400 MPa (approx. 58 ksi) yield strength
- Metric sizes: 10M ≈ 11.3 mm dia. (area ≈ 100 mm2), 15M ≈ 16.0 mm (≈ 200 mm2), 20M ≈ 19.5 mm (≈ 300 mm2)
- Design intent in the field
- Keep laps and hooks per the engineer of record (EOR) and code
- Maintain specified cover with chairs and dobies
- Ensure bar spacing so aggregate can flow and vibrate properly
For a quick refresher on fundamentals, see this primer on how rebar strengthens concrete.
Types, Grades, Coatings, and Mesh Options
Choose reinforcement by exposure conditions, required strength, and constructability. Carbon steel 400W/500W covers most needs. Epoxy-coated bars add corrosion resistance. GFRP suits highly corrosive or non-metallic applications. Welded wire mesh speeds slab placement where uniform distribution is desired.
Dass Rebar maintains Ontario-ready stock: 400W/500W, epoxy-coated options, Glass Fiber Reinforced Bars (GFRB), and welded wire mesh in 6×6 at 6/6, 9/9, and 10/10 gauges. Selecting among these hinges on your environment, design loads, and installation method.
At-a-glance comparison
| Option | Typical use | Strength class | Corrosion resistance | Notes |
|---|---|---|---|---|
| Carbon steel rebar (400W/500W) | General slabs, walls, footings, beams | 400–500 MPa yield | Good with proper cover | Most economical; widely available in 10M/15M/20M and more |
| Epoxy-coated rebar | Parking decks, bridge decks, splash zones | Base steel is 400W/500W | Enhanced protection | Avoid coating damage; use non-metallic chairs and tie wire as specified |
| GFRP (Glass Fiber Reinforced Polymer) | Highly corrosive or electromagnetically sensitive areas | Material-specific; non-yielding | Excellent (non-metallic) | Different design behavior than steel; follow EOR guidance |
| Welded wire mesh (WWM) | Slab-on-grade, toppings, sidewalks | Wire sizes per spec | Good distribution | 6×6–6/6, 9/9, 10/10 common; must be chaired to mid-depth |
For a deeper dive on mesh selection, review this overview of wire mesh types and uses. If your project requires a consolidated rebar package plus light-gauge steel products, explore the broader JDASS network’s rebar product range.
Estimating, Detailing, and Shop Drawings
Accurate estimating and buildable shop drawings prevent site delays. Link quantities to bar marks, bends, and laps; show clear placement details; and coordinate openings and embeds. In-house detailing with fast RFIs keeps pour schedules intact and minimizes rework.
Our in-house estimating and detailing teams help Ontario contractors avoid common pitfalls: ambiguous callouts, missing splice logic, and uncoordinated embeds. Tighter documents mean faster fabrication, better labeling, and fewer “Where does this go?” moments on the slab.
What to include in a constructible rebar package
- Bar list with marks: Sizes (10M/15M/20M etc.), lengths, bends, quantities
- Lap and anchorage notes: Per EOR and code for each member type
- Clear placement drawings: Spacing, cover, supports, couplers, and sequence
- Conflict checks: Openings, sleeves, and embeds coordinated with trades
- Labeling and bundling plan: Matches pour breaks and site crane zones
Need a refresher on fundamentals and terminology? Start with our Ontario-oriented reinforcing steel guide and the companion concrete rebar guide for field crews.
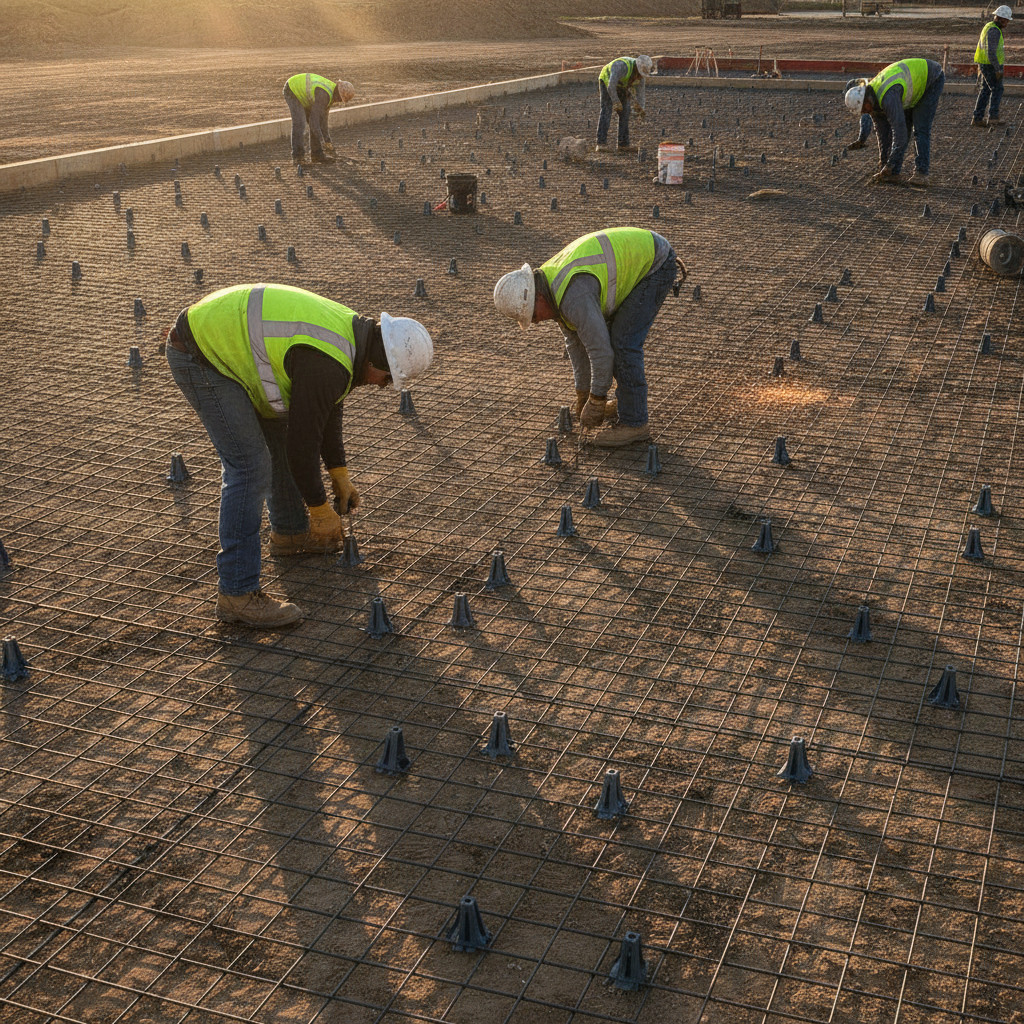
Fabrication, Delivery, and On-Site Assembly
Seamless execution links fabrication accuracy with punctual delivery and clear site staging. Pre-bend to spec, label by pour/zone, and schedule arrivals to match pump times. On-site, maintain cover, tie per plan, protect coatings, and verify against bar lists before concrete arrives.
Dass Rebar’s dedicated trucking fleet keeps Ontario projects moving with predictable windows. When bars are bundled to match your pour breaks and labeled by zone, unloading and staging take minutes—not hours. That predictability reduces crane time and stress on compressed schedules.
Field-proven practices that save time
- Bundle logic: Group bars by slab panel, elevation, and crane zone
- Tag clarity: Include pour ID, bar mark, and drawing reference
- Staging map: Drop points near hoists/pumps minimize double handling
- Protection: Use plastic chairs/ties with epoxy-coated bars
- Pre-pour check: Bar lists vs in-place steel; confirm embeds and covers
For a process-level walkthrough, see our internal rebar supply guide and Ontario-focused fabrication guide.
Best Practices for Placement, Splicing, and QA
Best practices focus on cover, spacing, laps or couplers, and inspection readiness. Chair mesh into the slab’s middle third, hold bar spacing for aggregate flow, protect coatings, and document checks with photos and bar lists. Small habits upstream prevent major issues after the pour.
From our site support in the GTA, these are the habits that consistently pay off:
Placement and support
- Maintain cover: Use dobies/chairs that match the specified cover for the exposure class
- Tie technique: Tight enough to hold geometry; loose enough to avoid restraint cracking
- Mesh uplift: Chair welded wire mesh; don’t “hook and drag” mid-pour
Splicing and continuity
- Lap lengths: Follow EOR; longer laps may be required for epoxy-coated bars
- Mechanical couplers: Useful where laps are impractical or congestion is high
- Stagger splices: Avoid planes of weakness by alternating lap locations
Quality assurance
- Bar verification: Check heats/marks vs. delivery tickets and bar lists
- Coating integrity: Touch up epoxy nicks per manufacturer instructions
- Photo logs: Document reinforcement before placement for records and RFIs
When congestion threatens concrete consolidation, coordinate with the EOR to adjust spacing or use smaller aggregate. Well-placed reinforcement that allows vibration reduces honeycombing risk and improves long-term durability.
Tools and Resources Ontario Teams Actually Use
Use tight takeoff spreadsheets, bar list templates, and labeled bundle maps tied to pour breaks. Pair them with quick-reference field guides and a single supplier that estimates, details, fabricates, and delivers. Fewer handoffs mean fewer mistakes.
Teams we support prefer simple tools that align office and field:
- Takeoff workbook: Links drawings to bar marks and quantities
- Bundle map PDF: Color-coded drop zones and crane picks
- Field one-pagers: Cover, spacing, tying, and inspection checklists
- RFI tracker: Dates, owners, and resolutions to protect pour dates
If you’re new to Ontario specs or need a structured refresher, start with our reinforcing bar vs. mesh overview and then circle back to the Ontario reinforcing guide for deeper context.
Case Studies and Ontario Examples
Real projects prove process. Across Toronto, Waterloo, and Pickering, coordinated estimating, buildable details, and punctual trucks kept pours on schedule. Bundles labeled by zone and pour break shortened staging, and photo logs simplified inspections.
Here are patterns we’ve applied on Ontario jobs:
- The Hawthorne Residences (Toronto): Elevated slab cycles stabilized by labeled bundles and pre-checked embeds; fewer RFI delays.
- Hickory Terraces (Waterloo): PT-compatible detailing in transfer slabs; mesh chaired mid-depth to control early-age cracking.
- The Grand at Universal City (Pickering): Parking structure exposure justified epoxy-coated bars in splash zones; touch-up protocol enforced.
These project types also illustrate size selection: 10M for temperature and shrinkage reinforcement, 15M for typical slab main steel, and 20M in beams/walls where higher area is needed. If you work frequently with 20M, our 20M rebar guide outlines handling and staging tips for heavy bundles.
Need help aligning drawings, bundles, and delivery windows? Our in-house estimating, detailing, fabrication, and dedicated trucking fleet keep Ontario schedules predictable. Share your pour dates and elevations—we’ll map deliveries to them.
Request a coordination call and get a practical staging plan.
Local Specs and Logistics for Woodbridge
Working in Woodbridge? Proximity to 370 New Enterprise Way simplifies pickups and urgent drops. Coordinated delivery windows reduce queueing at busy sites, and neighborhood familiarity shortens learning curves for staging and inspections.
Local considerations for Woodbridge
- Plan deliveries to avoid peak traffic near the Highway 50 – Zum Queen Stop EB corridor; a 30-minute buffer helps keep pumping on time.
- Winter pours demand extra cover vigilance; moisture and freeze-thaw cycles accelerate corrosion if chairs and dobies aren’t correct.
- For tight urban sites, pre-bundle by crane pick. We can stage near Queen St / Highway 50 to minimize double handling when gates open.
If you manage multiple jobs across the Regional Municipality of York, a single supplier handling estimating through delivery reduces handoffs. Our supply process is designed for just that.
Specs, Sizes, and Selection Tips
Match size and grade to structural demand and spacing limits. In Canada, 10M (~11.3 mm), 15M (~16.0 mm), and 20M (~19.5 mm) are common. Grade 500W provides higher yield for compact steel areas; 400W remains a staple for general work.
Practical guidance we share with crews and PMs:
- 10M: Temperature/shrinkage steel in slabs and walls; ties and stirrups
- 15M: Main slab reinforcement; common in residential/commercial decks
- 20M: Beams, columns, and walls where higher area is needed
- Epoxy-coated: Parking/bridge decks and splash zones with de-icing exposure
- GFRP: Non-metallic needs; coordinate bar chairs and cutting methods
If you’re consolidating reinforcement and light-gauge products, JDASS network options streamline purchasing alongside rebar packages; see the rebar product lineup for context.
Delivery, Staging, and Pour-Day Readiness
Lock delivery windows to pour dates, not just site hours. Stage by crane pick, label clearly, and check bar lists as bundles land. A 10-minute receiving check saves hours if a truck turns with missing bars.
We plan routes that align with pump setups and hoist capacities. When a deck is framed at 7 a.m., steel should be staged the afternoon before. When weather compresses the window, a responsive fleet and labeled bundles keep your day viable.
- Checklist
- Confirm pour sequence and zones
- Share hoist capacities and access constraints
- Receive with bar list in hand; flag shortages immediately
- Protect coated bars from abrasion during staging
Common Pitfalls and How to Avoid Them
Most delays trace back to unclear drawings, missing labels, or late trucks. Solve them by coordinating early, labeling bundles to pour breaks, and assigning one person to receive and verify every load against bar lists and tickets.
- Ambiguous details: Resolve with quick RFIs before fabrication
- Congestion: Adjust spacing or bar sizes with the EOR so concrete consolidates
- Mesh on subgrade: Always chair mesh to mid-depth; dragging during pour doesn’t work
- Unprotected epoxy: Use plastic chairs/ties; touch up nicks as directed
- Receiving without checks: Verify bundle IDs and counts on arrival
Frequently Asked Questions
These quick answers address the questions Ontario builders ask most about reinforcing steel. Each response is succinct for fast decisions on the job.
What is the difference between Grade 400W and 500W?
Grade 400W has a nominal 400 MPa yield strength; 500W has about 500 MPa. Higher yield allows the same capacity with less steel area, subject to spacing and cover limits. Your engineer specifies the grade based on loads and detailing constraints.
When should I use epoxy-coated rebar?
Use epoxy-coated bars in chloride-rich or wet exposure like parking decks, bridge decks, and splash zones. Protect the coating during handling, use non-metallic chairs/ties, and repair nicks per manufacturer instructions to maintain corrosion resistance.
Does welded wire mesh replace rebar?
Mesh can replace individual bars in some slabs and toppings when specified. It provides uniform distribution and speeds placement, but it must be chaired into the slab’s middle third. For beams, columns, and concentrated loads, deformed bars remain standard.
What sizes are 10M, 15M, and 20M?
In Canada, 10M is about 11.3 mm diameter (≈100 mm² area), 15M about 16.0 mm (≈200 mm²), and 20M about 19.5 mm (≈300 mm²). Designers select sizes based on required steel area, spacing, and cover.
Conclusion: Build Stronger, Safer Concrete with the Right Reinforcement
Plan reinforcement like a process, not a purchase. When estimating, detailing, fabrication, delivery, and field checks align, pours run on time and concrete performs as designed. One accountable partner across phases reduces handoffs and risk.
Key takeaways
- Concrete needs steel for tension; steel needs proper cover, laps, and spacing
- Match grade/coating to exposure: 400W/500W, epoxy-coated, or GFRP
- Chair mesh; don’t rely on dragging during the pour
- Label bundles to pour breaks; verify deliveries against bar lists
- Leverage a single supplier for estimating through delivery to cut delays
Ready to line up drawings, bundles, and delivery windows? We support Ontario job sites daily from Woodbridge with end-to-end service. Let’s coordinate your next pour.