
Rebar projects are end-to-end plans that scope, detail, fabricate, deliver, and assemble reinforcing steel for concrete structures. Managed from takeoff to pour, they control risk, schedule, and quality. Serving Ontario builders from 370 New Enterprise Way, Dass Rebar coordinates estimating, detailing, fabrication, and delivery so rebar arrives ready to install.
By Navjot Dass • Last updated: 2026-05-23
Overview and Table of Contents
This complete guide explains how to run rebar projects from estimating through detailing, fabrication, delivery, and on-site assembly. Use it to reduce rework, compress pour schedules, and meet code with confidence. Jump to definitions, process steps, methods, best practices, tools, and real examples tailored to Ontario jobs.
Here’s what you’ll learn and how to use it on your next pour.
- Plain-English definition of a rebar project and why sequencing matters
- Practical, 7-step workflow from takeoff to placement (with checklists)
- Material choices: Grade 500W/400W, epoxy-coated, welded wire mesh, and GFRP
- Field methods: cages, mats, bar supports, lap splices, and QA documentation
- Delivery logistics that keep cranes, crews, and pumps moving
- Ontario-focused notes you can apply across the GTA
- Mini case insights drawn from residential, commercial, and municipal work
What Are Rebar Projects?
A rebar project is the coordinated set of tasks that moves reinforcing steel from quantity takeoff through detailing, fabrication, delivery, and on-site assembly before concrete placement. The objective is predictable strength, code compliance, and schedule certainty through standardized drawings, bar lists, tags, and field QA.
In day-to-day terms, a rebar project is a plan plus a paper trail. It starts with a clean set of drawings and ends with placed steel ready for inspection. In our experience supporting general and concrete contractors across Ontario, the most reliable outcomes come from keeping estimating, detailing, fabrication, logistics, and site assembly under one coordinated umbrella.
- Scope: Slabs, walls, columns, cores, footings, grade beams, stairs, podiums.
- Artifacts: Shop drawings, bar bending schedules (BBS), placing drawings, delivery tickets, heat numbers (where required), and inspection sign-offs.
- Materials: 400W and 500W deformed bar, epoxy-coated options, welded wire mesh (6 × 6 at 6/6, 9/9, 10/10), and GFRP for specific exposures.
Because rebar and concrete work as a composite, the steel must be in the right place at the right time. That’s what rebar projects make possible.
Why Rebar Projects Matter
Rebar projects matter because they protect structural performance, compress schedules, and lower rework risk. When estimating, detailing, fabrication, and trucking align, crews place bars faster, inspectors approve on first pass, and pours proceed without last‑minute scrambles or material substitutions.
Here’s the thing: most schedule slips in concrete work trace to information gaps, not labor effort. When bar marks, bends, and lap splices aren’t crystal clear, crews improvise. That leads to callbacks. We’ve found that tight coordination from takeoff through delivery produces steadier pour windows and fewer site RFIs.
- Structural reliability: Correct cover, spacing, and anchorage deliver the design capacity the engineer intended.
- Compliance: Using 400W/500W grades and documenting epoxy-coated or GFRP where specified keeps projects aligned with contract and municipal requirements.
- Productivity: Tagged bundles and staged deliveries let crews place steel in sequence, often eliminating double-handling.
- Traceability: Shop drawings and delivery tickets make inspections faster and reduce disputes.
For developers and construction managers, the takeaway is simple: a coordinated rebar project is a schedule management tool as much as a structural requirement.
How Rebar Projects Work: The 7-Step Workflow
Successful rebar projects follow a repeatable sequence: scope review, estimating/takeoff, detailing and shop drawings, fabrication, delivery logistics, field assembly, and pre‑pour QA. Lock this sequence and you’ll keep cranes, pumps, and crews synchronized from first gridline to final pour.
1) Scope review and risk alignment
- Confirm drawings, addenda, and latest revisions. Capture exposure conditions, epoxy/GFRP needs, seismic or durability notes, and inspection requirements.
- Clarify interfaces: embeds, sleeves, mechanical/electrical openings, and pour breaks.
- Outcome: shared assumptions, RFI log, and a prioritized risk list.
2) Estimating and quantity takeoff
Our in-house team performs the takeoff, converting design intent into bar counts, lengths, and bends. Clear takeoffs help you plan pours and labor with fewer surprises.
- Bar sizes by element (e.g., 10M, 15M, 20M where specified) with lap splice assumptions.
- Welded wire mesh choices: 6 × 6 at 6/6, 9/9, or 10/10 for slabs-on-grade or toppings.
- Preliminary staging plan tied to pour sequence.
For deeper context on this phase, see our rebar estimating guide.
3) Detailing and shop drawings
Detailing translates takeoffs into precise placements and bend shapes. This is where errors disappear—or multiply. Our in-house detailing shortens that loop.
- Generate placing drawings with bar marks, bends, hooks, and lap lengths.
- Create a bar bending schedule that the shop can cut and bend without guesswork.
- Coordinate embeds, construction joints, and openings to avoid field clashes.
Explore our approach in the rebar detailing guide.
4) Fabrication: cutting and bending
With approved drawings, fabrication turns paper into tagged bundles. Consistency matters here: repeatable bends, clean cuts, and legible tagging accelerate field placement.
- Fabricate 400W and 500W bars with consistent rib patterns and bends as detailed.
- Prepare epoxy-coated bars where specified and protect during handling.
- Pre-assemble cages or mats for high-repetition elements when it saves crane time.
For a deeper dive into shop standards and staging, read our rebar fabrication guide.
5) Delivery and logistics
Delivery timing makes or breaks placement productivity. Our dedicated trucking fleet sequences drops against your pour calendar so materials land just in time and in the right order.
- Bundle-level tags map to placing drawings for quick identification.
- Staggered deliveries align with crane windows, street use permits, and pour starts.
- Dedicated fleet reduces rescheduling friction when weather shifts the plan.
For supply planning tips, see our rebar supply guide.
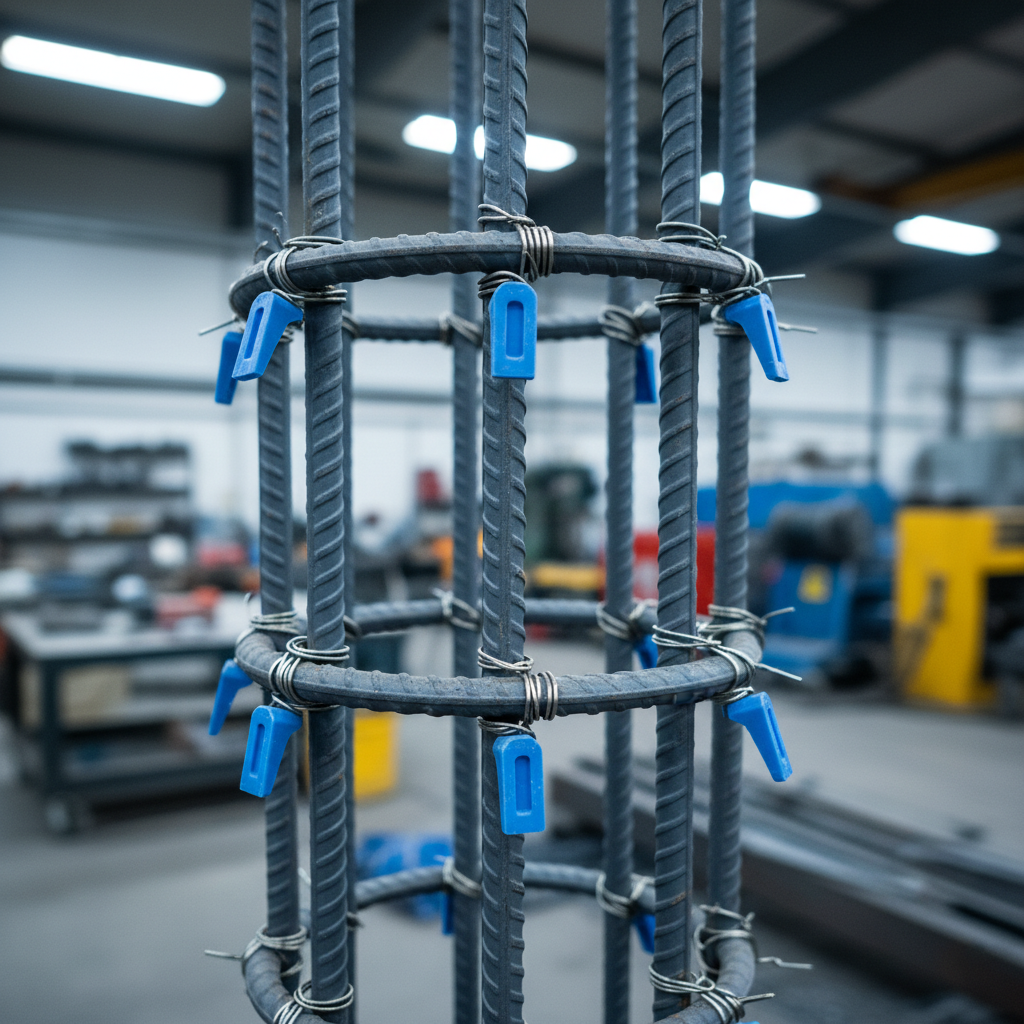
6) Field assembly and placement
Once on site, bars are sorted, hoisted, and tied in sequence. Chairs, spacers, and bar supports preserve cover; tying patterns and lap splices match the placing drawings.
- Check cover, spacing, and orientation per drawings before tying off a zone.
- Use prebuilt cages or mats to reduce tying time in repetitive elements.
- Keep walkways clean and protect epoxy-coated bars from abrasion.
7) Pre-pour QA and inspection
Pre-pour checks confirm the steel you planned is the steel in place. A fast, consistent checklist eliminates stop-work surprises.
- Confirm bar marks against the placing drawings and bar list.
- Verify lap and development lengths, hooks, and anchorage details.
- Document fixes with photos and sign-offs for your closeout package.
Types, Materials, and Approaches Used in Rebar Projects
Most rebar projects blend conventional 400W/500W deformed bar with welded wire mesh and specialty options like epoxy-coated steel or GFRP. Approaches range from stick-placing single bars to flying prefabricated cages and mats—each chosen to balance crew time, crane access, exposure conditions, and inspection needs.
Material options you’ll actually specify
- Grade 400W rebar: Nominal yield strength of 400 MPa; common in slabs, beams, and walls.
- Grade 500W rebar: Nominal 500 MPa yield where higher capacity or tighter spacing is desired.
- Epoxy-coated rebar: Added corrosion resistance for deicing-salt exposure, podium decks, or parking structures.
- Welded wire mesh: 6 × 6 at 6/6, 9/9, or 10/10; accelerates slab reinforcement and controls shrinkage cracking.
- GFRP (Glass Fiber Reinforced Polymer): Non-corroding option for certain aggressive environments; different modulus than steel, so detailing notes matter.
We maintain stock of commonly used sizes so you can stage work without pauses. Learn how mesh and bar selection impacts cycle time in our rebar and wire mesh overview.
Approaches to placing and sequencing
- Stick placement: Bars are placed and tied one by one. Flexible for congested zones.
- Prefabricated cages: Shop-built column or pier cages speed crane cycles and improve repeatability.
- Prefabricated mats: Pre-tied mats for slabs reduce on-deck tying in repetitive grids.
- Hybrid staging: Mix mats in open areas with stick-placed bars at penetrations.
Comparison at a glance
| Option | Best For | Crew Impact | Notes |
|---|---|---|---|
| Grade 500W | Higher loads, tighter bar spacing | Fewer pieces for same capacity | 500 MPa yield; confirm bar spacing vs cover |
| Epoxy-coated steel | Deicing salts, podiums, garages | Careful handling to protect coating | Tag and stage separately from black bar |
| Welded wire mesh | Slabs-on-grade, toppings | Fast placement | 6 × 6 at 6/6, 9/9, or 10/10 configurations |
| GFRP | Chloride-rich or specialty zones | Different handling and tie practices | Non-corroding; distinct design properties |
Best Practices That Keep Rebar Projects On Track
Lock drawings, logistics, and QA early. Use in-house estimating and detailing for fast revisions, tag bundles to placing drawings, and align truck drops to pour windows. Protect coating on specialty bars, preserve concrete cover, and document pre‑pour checks for first‑pass inspections.
- One source of truth: Keep a live revision index so field crews never tie from outdated sheets.
- Bundle-to-drawing mapping: Use bar marks on tags that match placing drawings for instant identification.
- Staggered deliveries: Land only what each pour needs; avoid clutter that slows cranes and crews.
- Cover protection: Chairs and spacers are non-negotiable—cover is structural, not cosmetic.
- Special handling: Separate epoxy-coated or GFRP to avoid mix-ups and damage.
- QA photos: Quick photos at gridline scale save time in inspections and closeout.
These habits are the backbone of our reinforcing steel workflow and show up on every successful pour we support.
Local considerations for 370 New Enterprise Way
- Align truck arrivals with regional rush periods and municipal staging needs; a dedicated fleet helps keep pours on schedule when the GTA traffic pattern shifts.
- Plan weather flex days during freeze-thaw or hot spells to protect epoxy and maintain cover; staging under shelter can preserve coating integrity.
- Coordinate cranes and street use windows early with your superintendent; sequencing bundles by pour break prevents double-handling on tight urban sites.
Tools and Resources You Can Use Right Now
Use placing drawings, bar bending schedules, tagged bundles, and a pre‑pour checklist as your core toolkit. Add a delivery calendar tied to pour breaks, a photos-first QA routine, and simple revision control to cut RFIs and keep inspectors moving.
- Placing drawings + BBS: The daily playbook for foremen and inspectors.
- Delivery calendar: Sync truck drops, crane time, and pump starts.
- Tag legend: Simple legend that maps tag marks to drawing marks.
- Pre-pour checklist: Cover, spacing, lap lengths, hooks, embeds cleared, penetrations checked.
- Photo log: Quick gridline photos before and after tying key zones.
Need a refresher on product choices? Review our concrete rebar guide and this related overview of reinforcing bar.
Helpful next step: If you’re sequencing multiple cores or podium pours, we can map deliveries to your crane calendar and tag bundles to each pour break. Reach out via the site and we’ll align estimating, detailing, fabrication, and trucking to your dates.
Case Studies and Practical Examples
When estimating, detailing, fabrication, delivery, and assembly run in one loop, cycle times stabilize and inspections pass cleanly. Across residential, commercial, and municipal work, consistent tagging, staged drops, and pre‑pour photos eliminate bottlenecks and preserve finish schedules.
Consider a mid-rise podium deck. The engineer specified 500W top steel with epoxy-coated bars at the ramp. By pre-tagging bundles to the placing drawings and landing epoxy separately, the crew avoided mix-ups and tied the field without rework. QA photos at gridlines gave the inspector quick confidence.
- Residential tower mat: Using prefabricated mats in open zones and stick-placing around penetrations balanced crane time with tying speed.
- Municipal retaining wall: 400W horizontal steel with GFRP dowels at splash zones kept durability requirements clear in detailing and in the field.
- Parking structure slab: 6 × 6 welded wire mesh staged on carts reduced deck tying time and preserved walking paths.
We support this approach with stocked 10M and 15M bars and 20M on request, plus welded wire mesh in standard configurations. See how supply planning connects to field outcomes in our steel rebar guide.

Frequently Asked Questions
These quick answers address common planning, detailing, delivery, and inspection questions we hear from Ontario builders. Each response is concise and action‑oriented so your team can move from drawings to placement with fewer RFIs and less rework.
What’s the fastest way to start a rebar project?
Agree on drawings and pour sequence first. Then request in-house estimating and detailing so fabrication can start against a clean bar list. Stagger deliveries to match pours, and tag bundles to the placing drawings. That sequence removes guesswork and keeps inspectors aligned with your schedule.
When should I choose epoxy-coated or GFRP instead of black bar?
Use epoxy-coated steel where road salts or chlorides are expected, such as podiums, ramps, and garages. Consider GFRP in aggressive environments or when corrosion resistance is essential. Note that GFRP has different properties than steel, so detailing and inspection practices will differ.
How do I keep cover consistent across the deck?
Use the right chairs and spacers for your slab thickness, tie patterns that prevent lift during foot traffic, and stage mats or bars so walkways stay clear. A quick pre‑pour check at gridlines confirms spacing, laps, hooks, and cover before the inspector walks the deck.
What documents should be on hand for inspection?
Keep placing drawings, the current revision index, bar lists, and delivery tickets on site. For specialty bars, maintain handling notes. Photos of key zones at gridlines help resolve questions quickly. Organized paperwork shortens inspections and reduces the chance of stop‑work orders.
Conclusion and Next Steps
Treat rebar projects as a single, coordinated loop—estimating, detailing, fabrication, delivery, and assembly. With stocked grades and mesh, a dedicated fleet, and in-house expertise, you can stabilize cycle times, simplify inspections, and move from drawings to pours with fewer surprises.
- Lock the sequence: takeoff → detailing → fabrication → delivery → assembly → pre‑pour QA.
- Tag bundles to drawings and land only what each pour needs.
- Use 400W/500W, welded mesh, epoxy-coated or GFRP as the design requires.
- Document with photos and revision control to pass inspections faster.
Ready to streamline your next pour? We coordinate estimating, detailing, fabrication, delivery, and assembly across Ontario from our base at 370 New Enterprise Way. Let’s map your pours and keep the crane moving.
Related topics to explore
For deeper planning detail, see how mesh selection affects slab cycles in our rebar and wire mesh guide, why revision control matters in this reinforcing steel guide, and how fabrication staging speeds placement in our fabrication guide. If you’re scheduling pours around rebar availability, start with our supply guide and plan your takeoff using our estimating process. For size-specific planning, this 10M rebar use guide shows how bar size affects spacing and cover; 20M applications follow the same principles.
Looking for background on steel products that sit upstream of rebar work? Review this concise overview of rebar product fundamentals, and the framing content on safer builds with steel framing and heavy‑gauge framing basics to see how reinforcing decisions interface with broader structural choices.